Moulding and Casting
Individual Assignment
Design a 3D mould around the stock and tooling that you'll be using, mill it (rough cut + (at least) three-axis finish cut), and use it to cast parts.
Group Assignment
Review the safety data sheets for each of your mounding and casting materials
Make and compare test casts with each of them
Individual Assignment
Molding or Moldmaking is the act of creating the cavity / form that carries a negative or reverse impression of an original model.
Molds can be made of a rigid material, such as plaster or plastic resin or more commonly, a flexible material such as rubber.
The material to use should be chosen considering the material of the model, the material to be used to make castings,
and whether there are any undercuts.
Casting is the act of pouring liquid material into the cavity of a mold. After a period of time, this liquid will cure via chemical reaction or cooling. The solidified part is also known as a casting, which is ejected or broken out of the mold to complete the process. Casting materials are usually metals or various cold setting materials that cure after mixing two or more components together; examples are epoxy, concrete, plaster and clay.
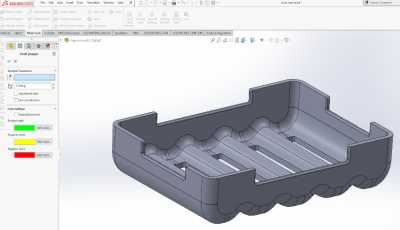
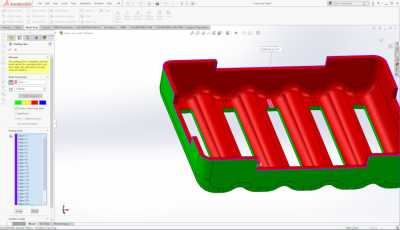
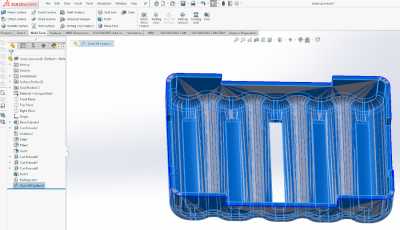
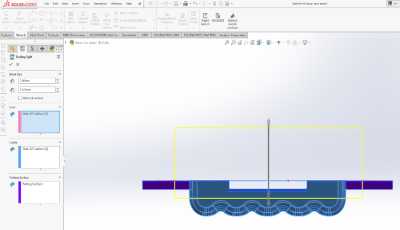
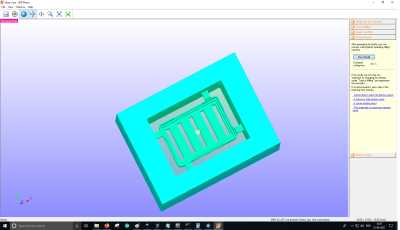
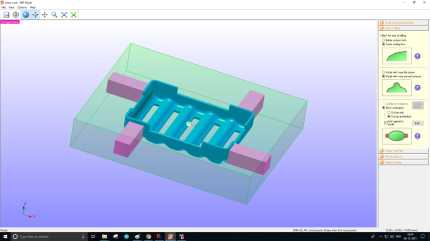
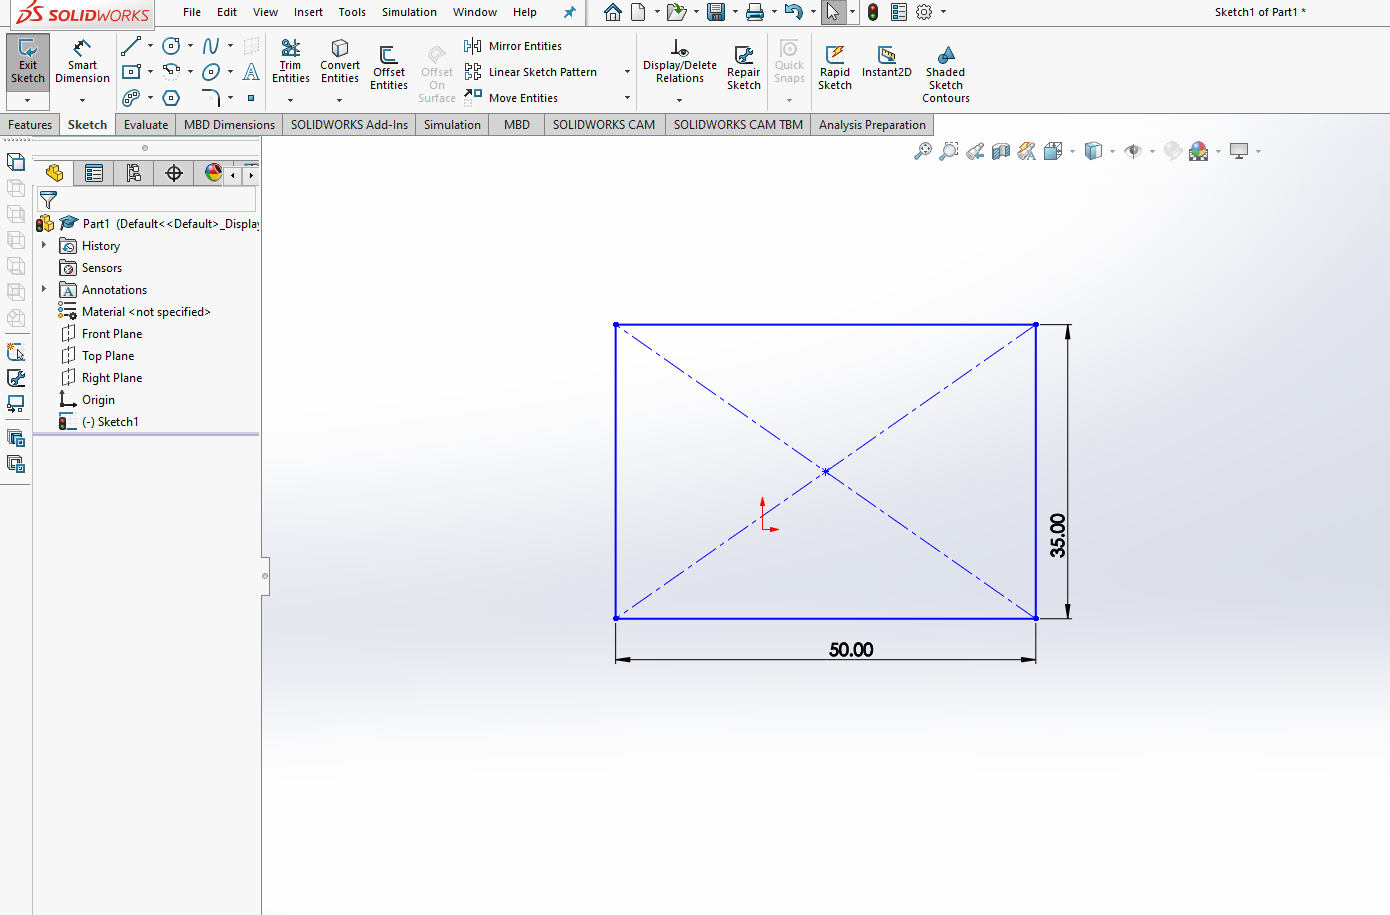
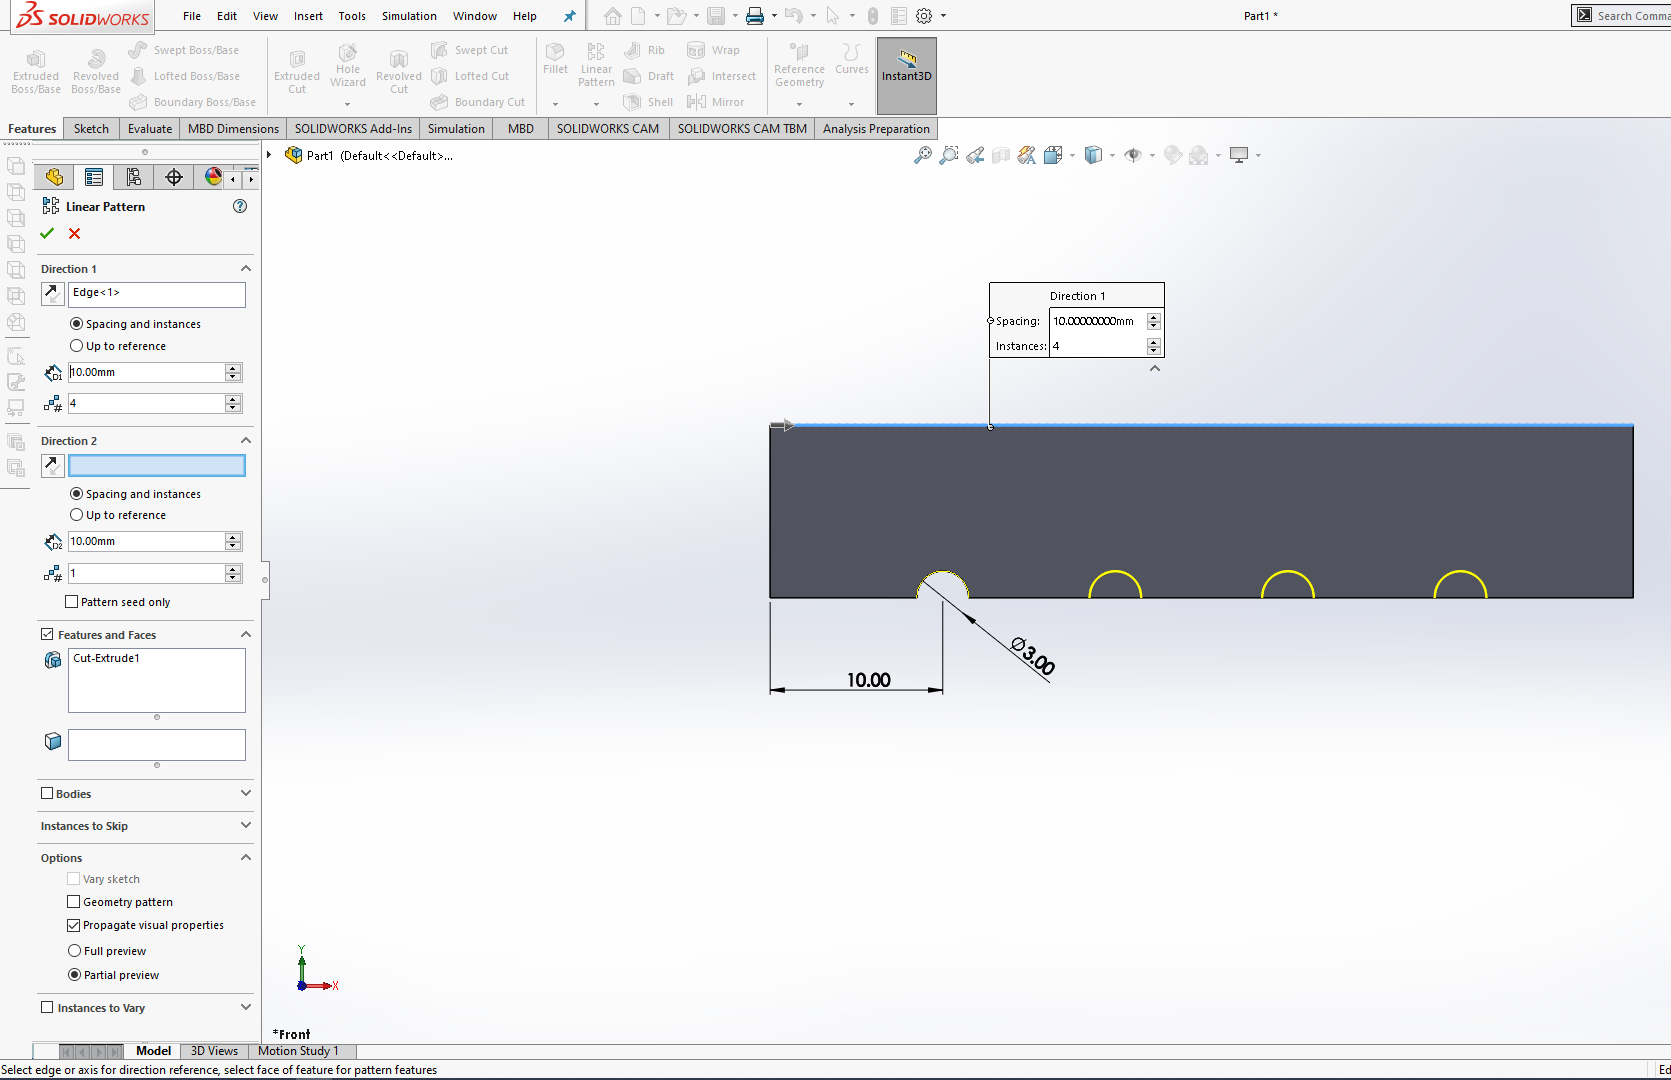
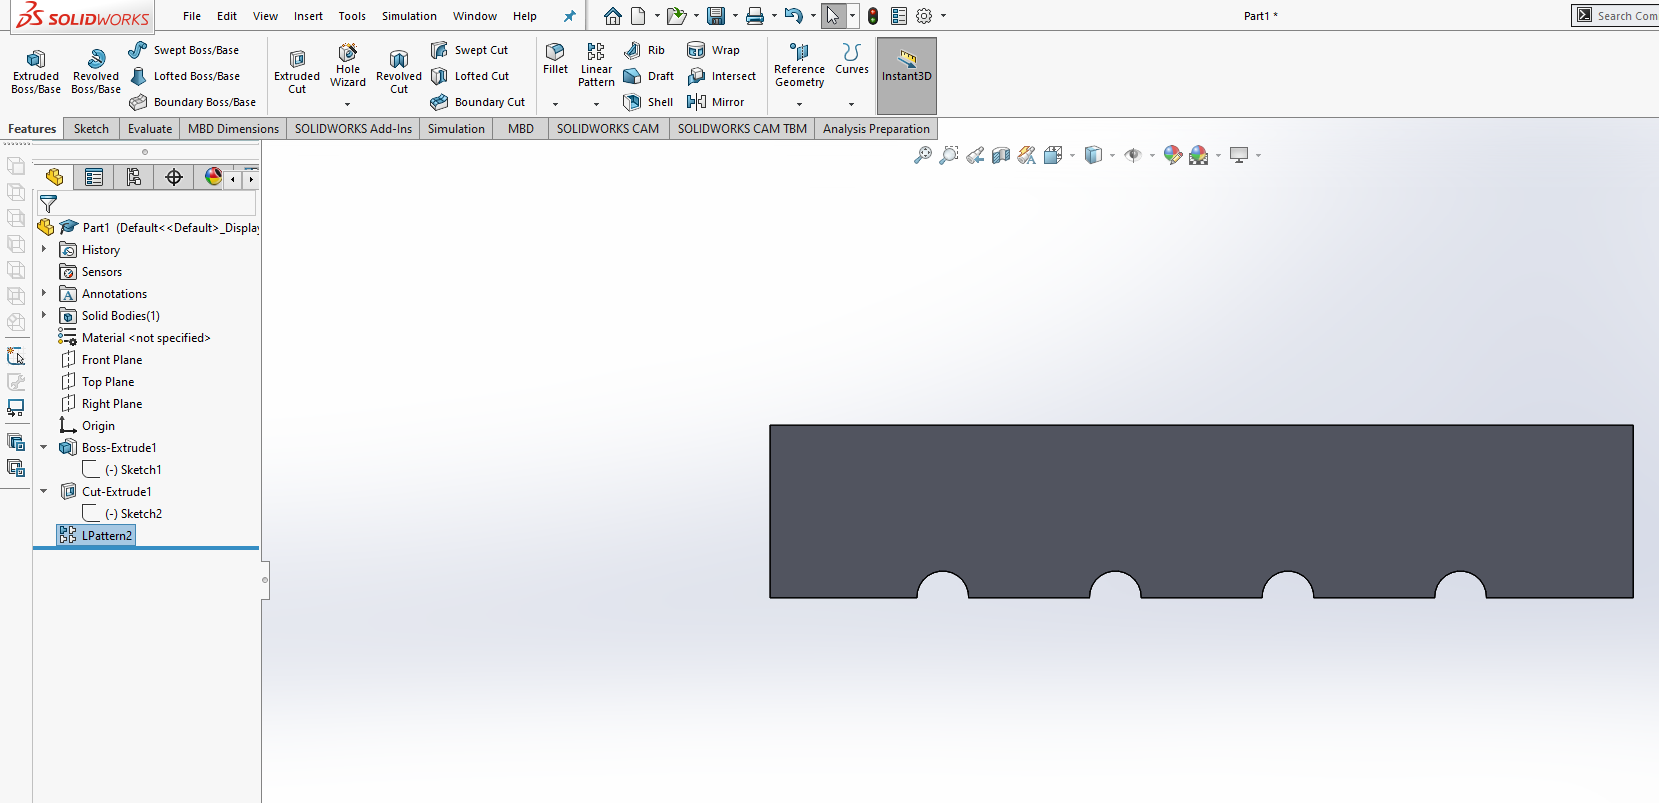
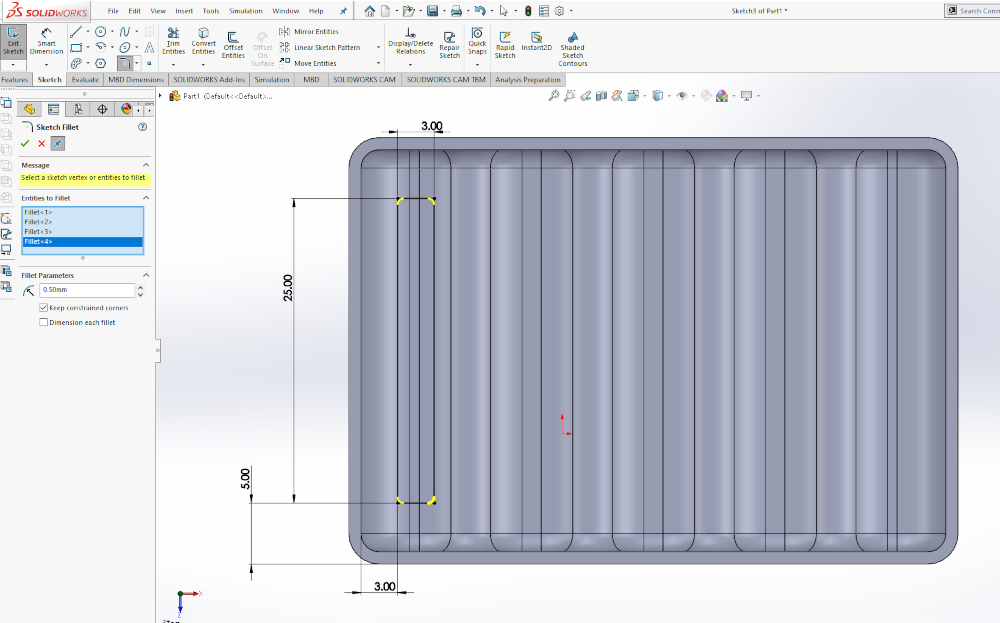
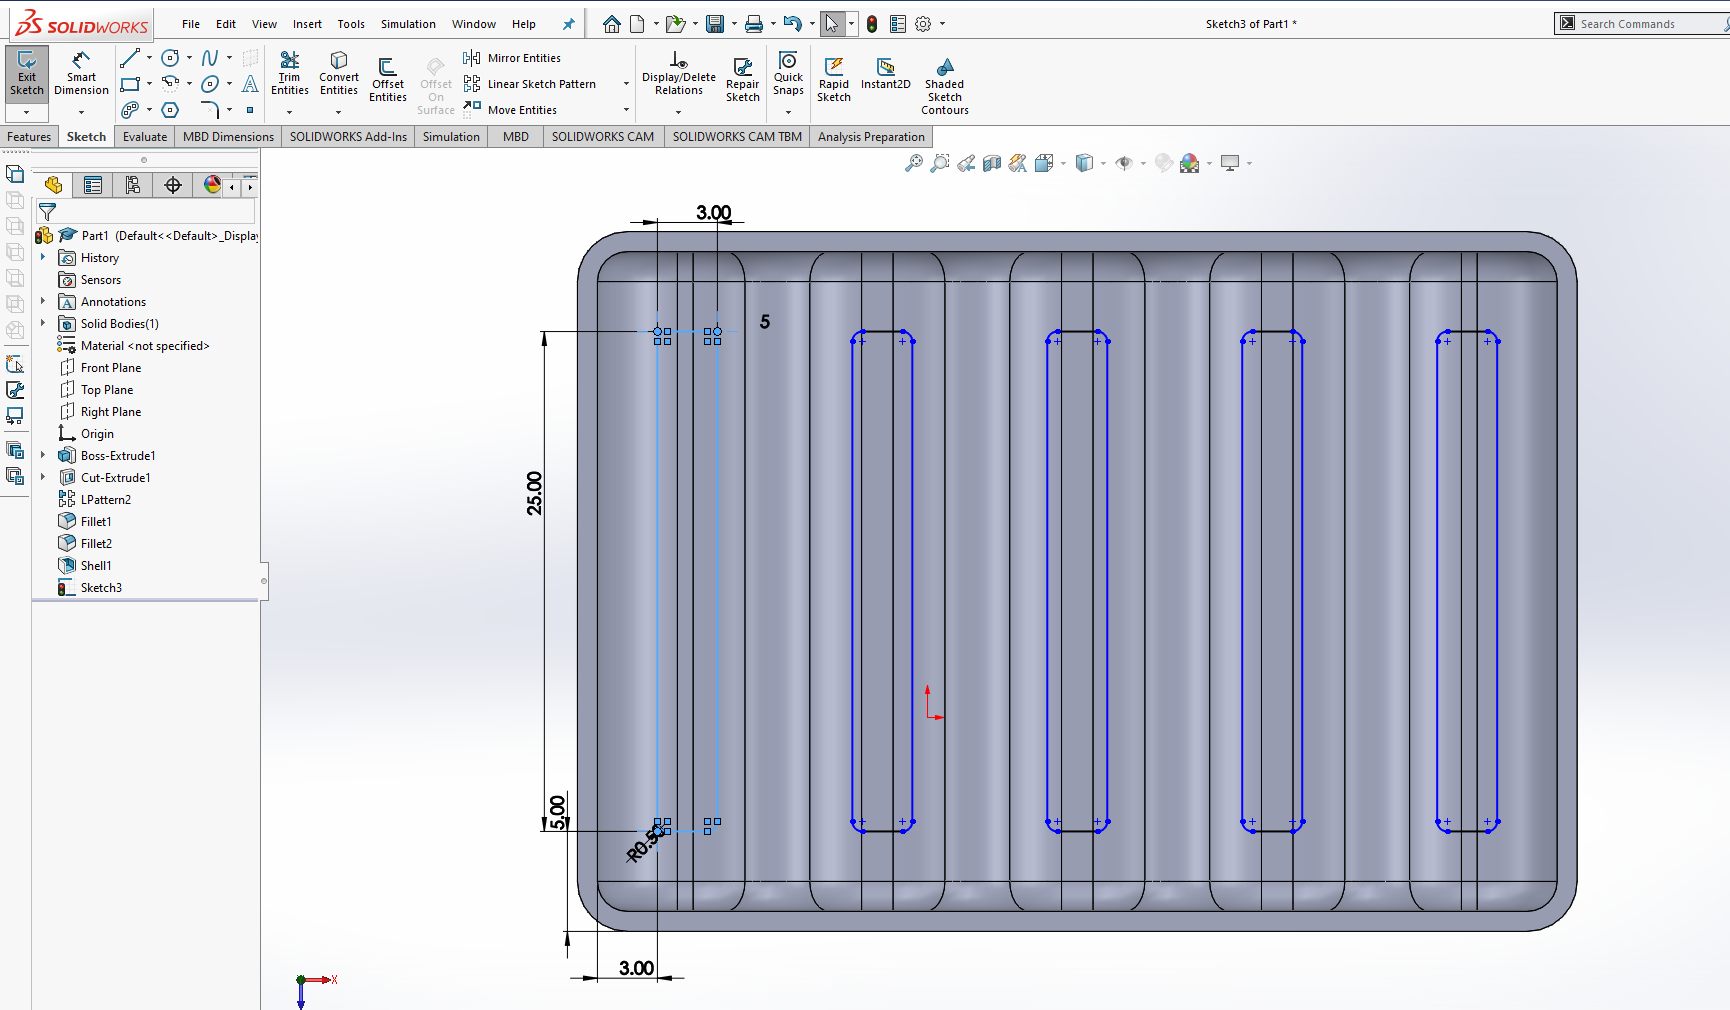
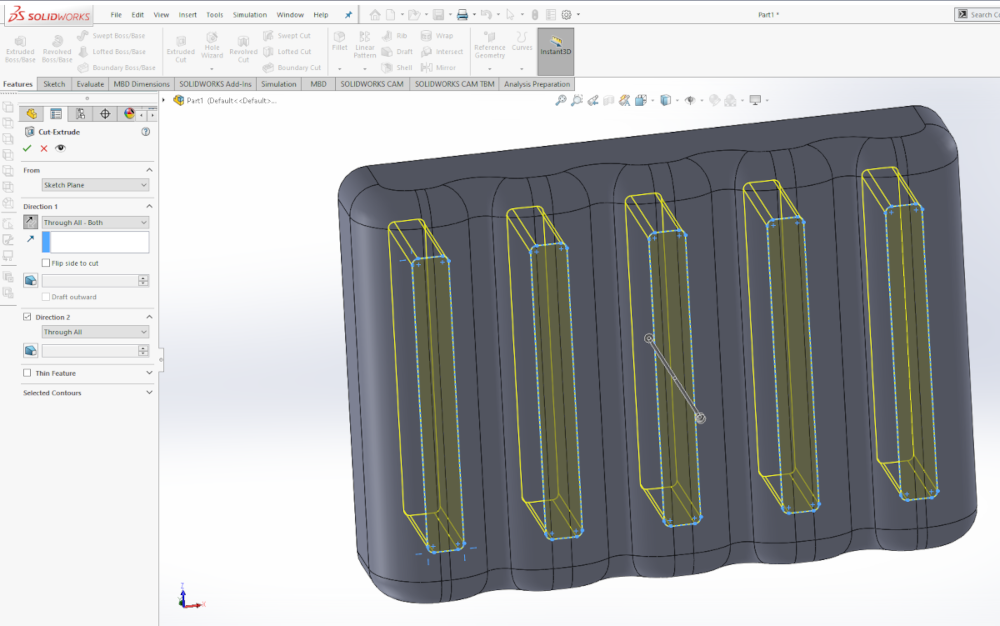
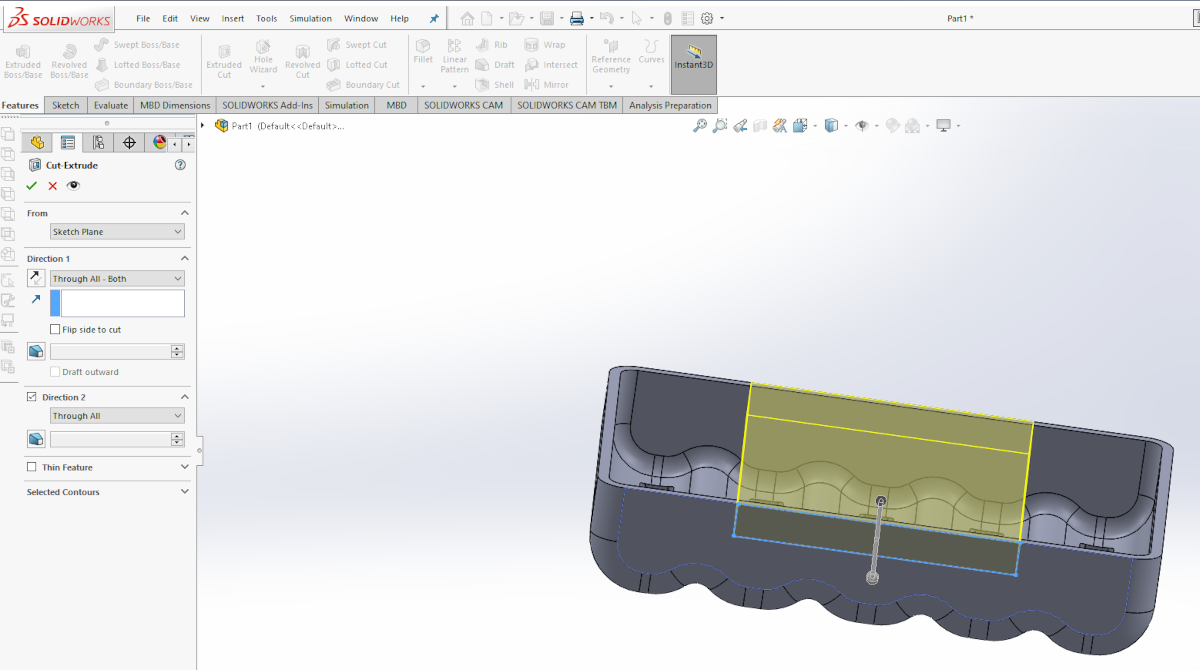
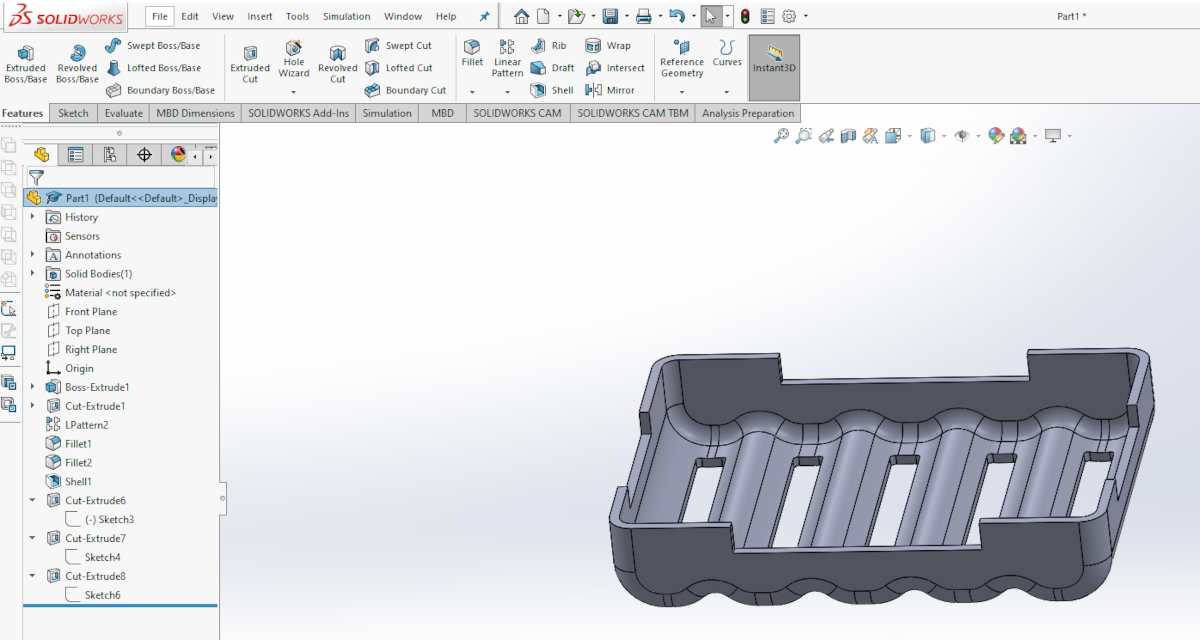
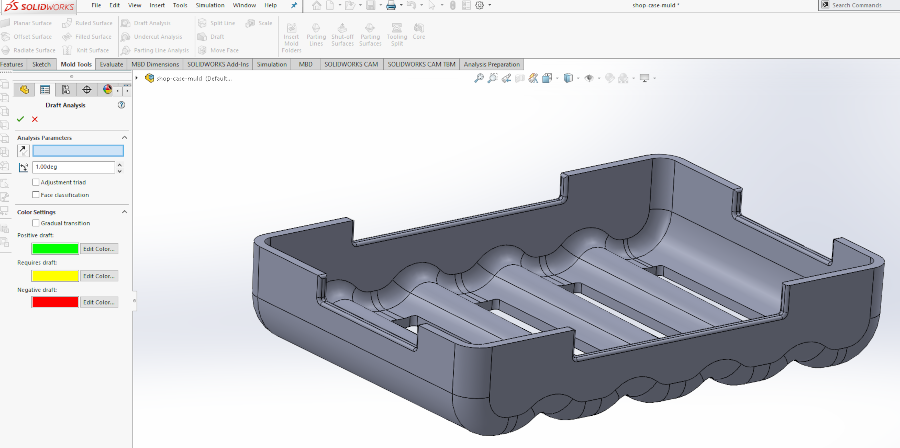
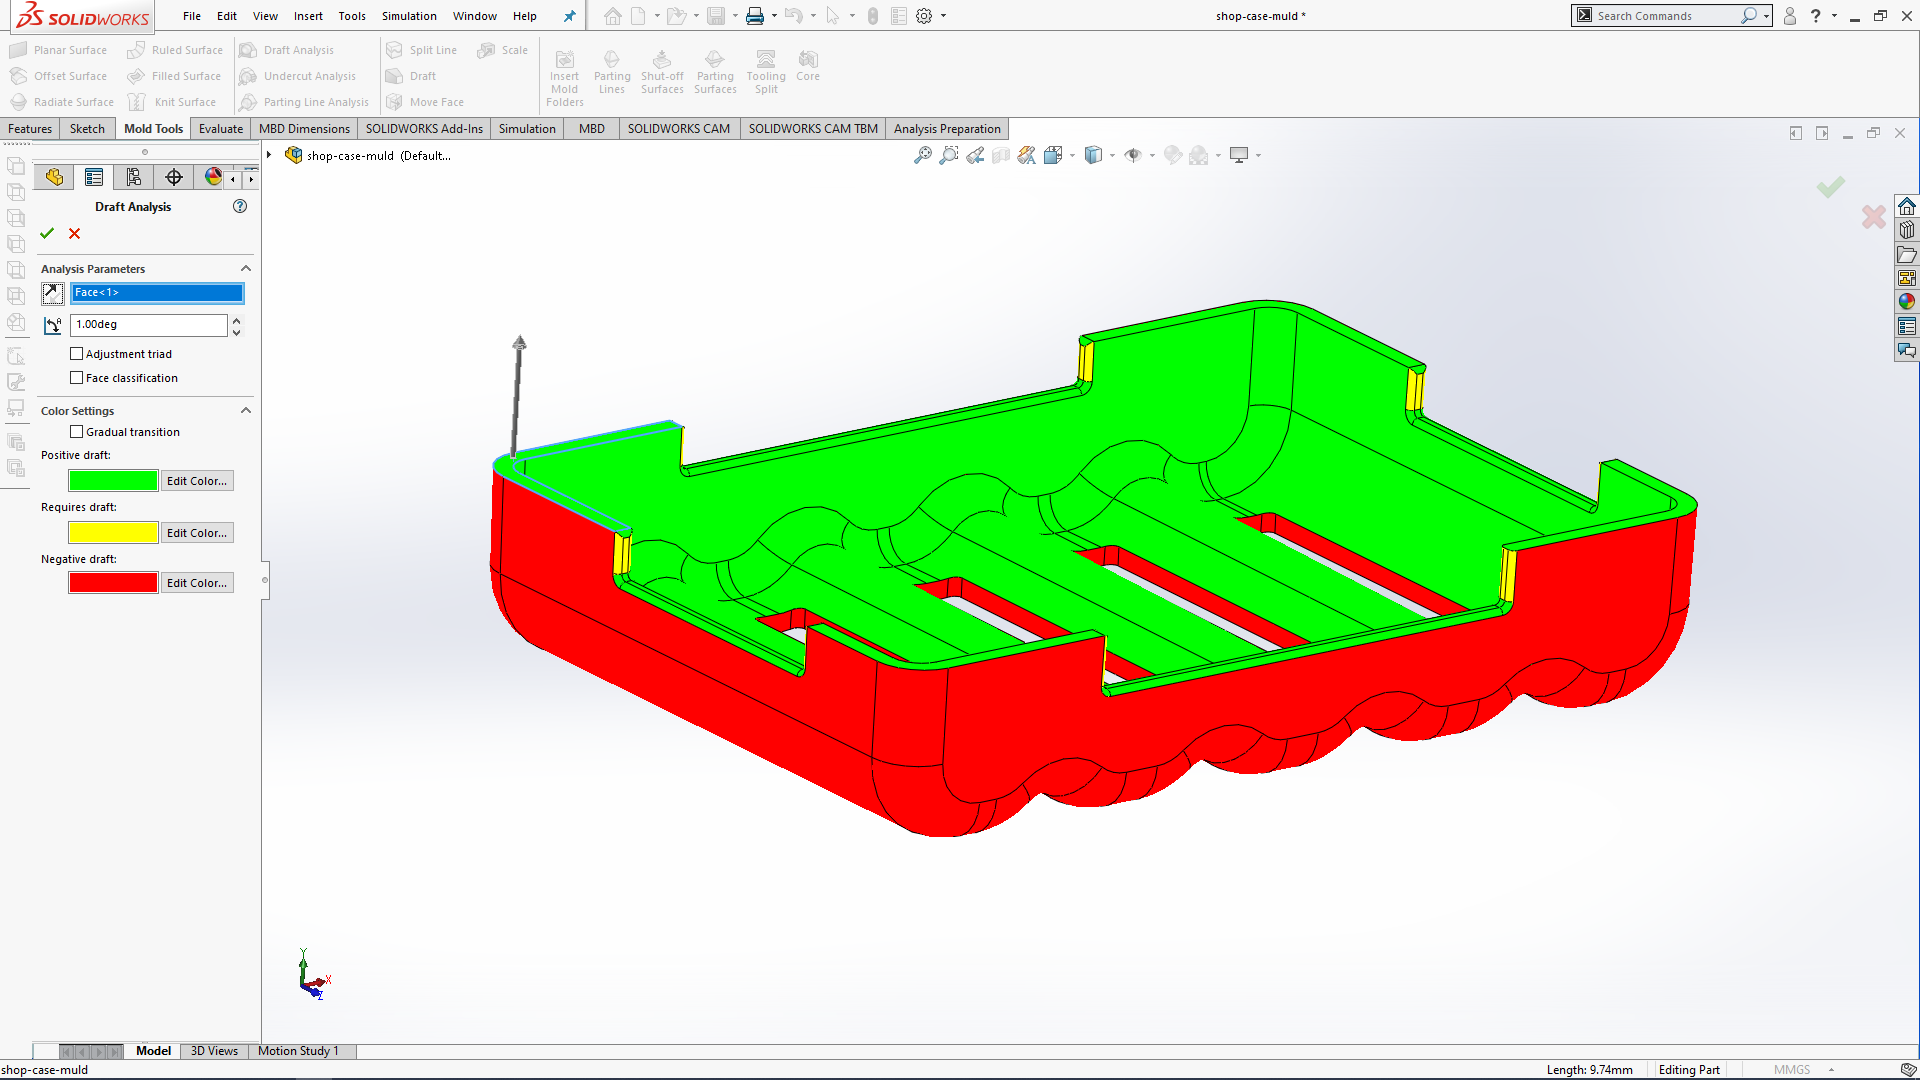
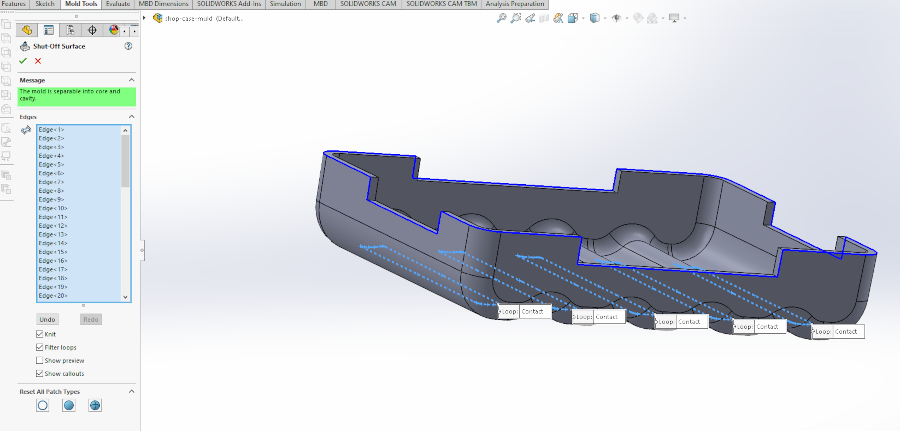
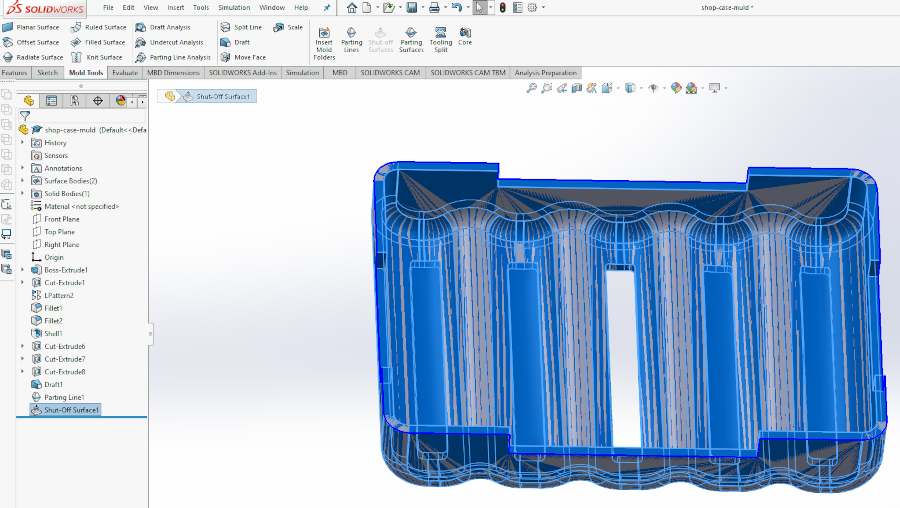
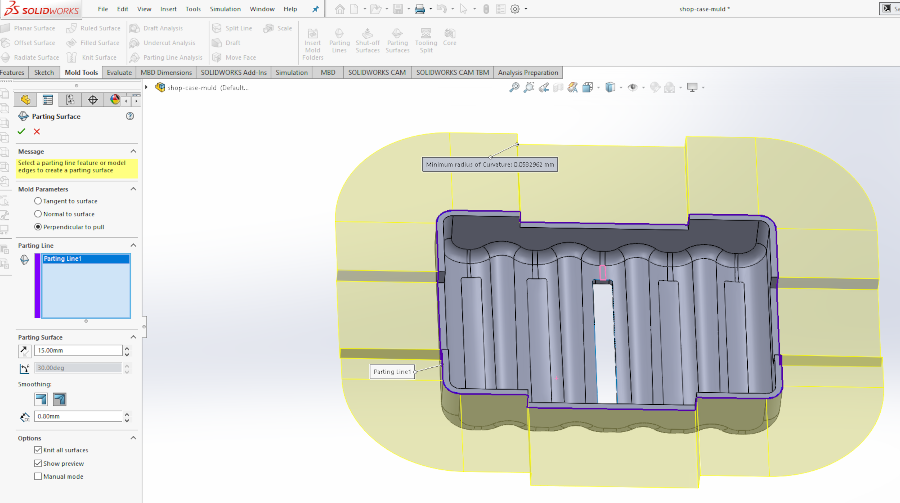
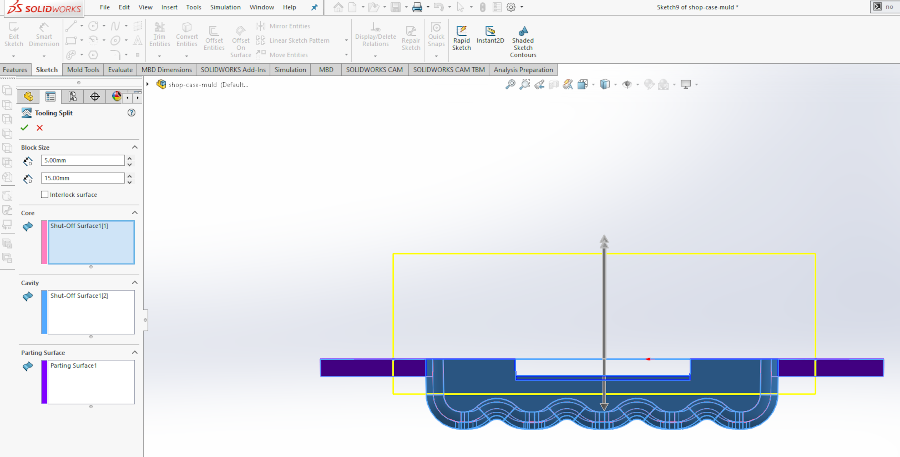
3D Mould Designing.
I am using solid works to design for the 3D shop case. following is the details design.


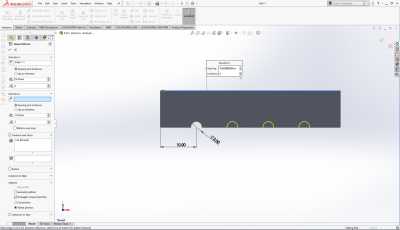
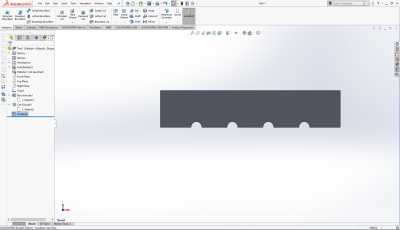
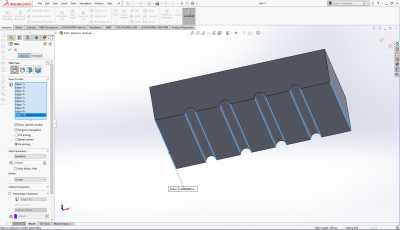
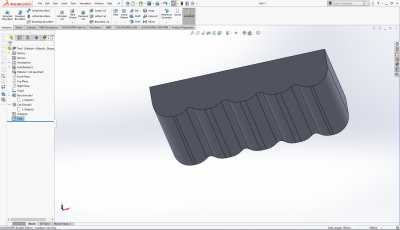

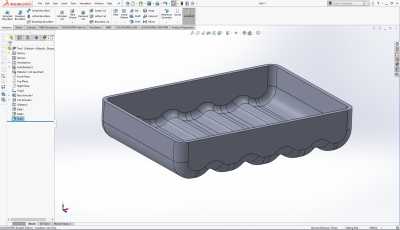
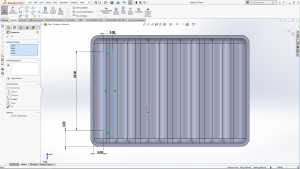
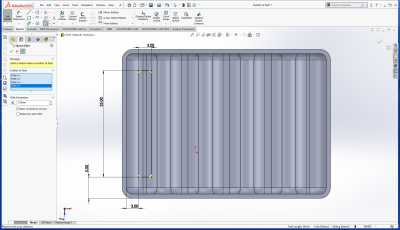
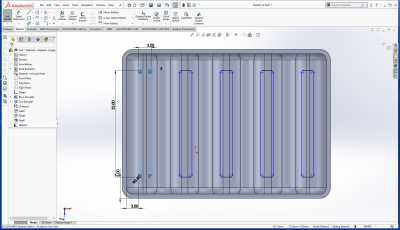

Mould part design in solid works


Mould Making
I get very less time due Covid-19 the night curfew and lock
down weekend at my place.I am also bit
worried due to see the frequent movement of Ambulance
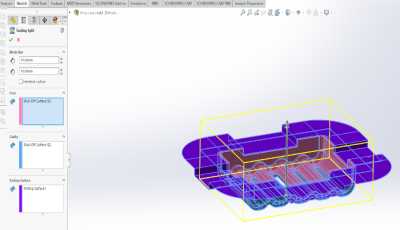
I am very new to this subject i am discuss with Mr.Sibu i have decided to do both side moulding it is bit difficult for beginner i have to do o learn new things
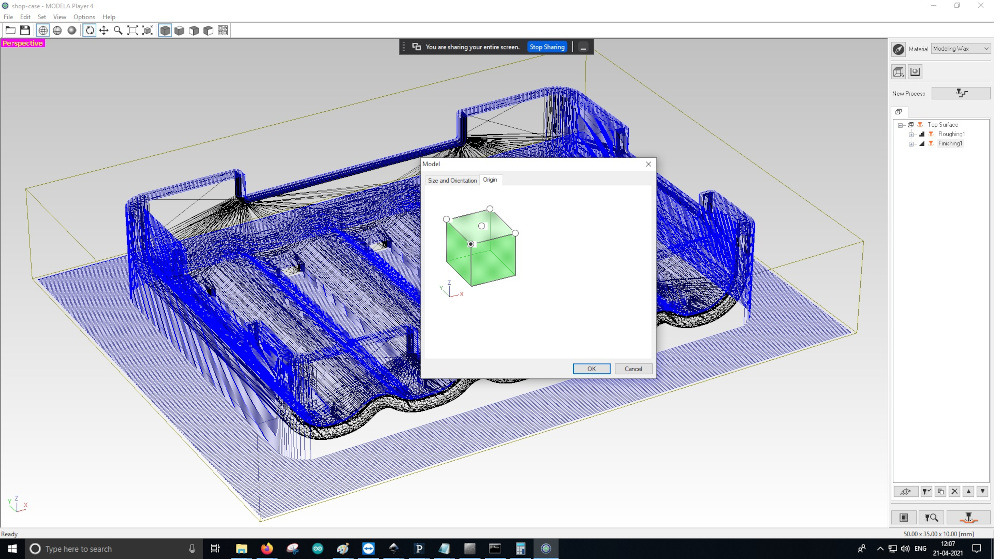
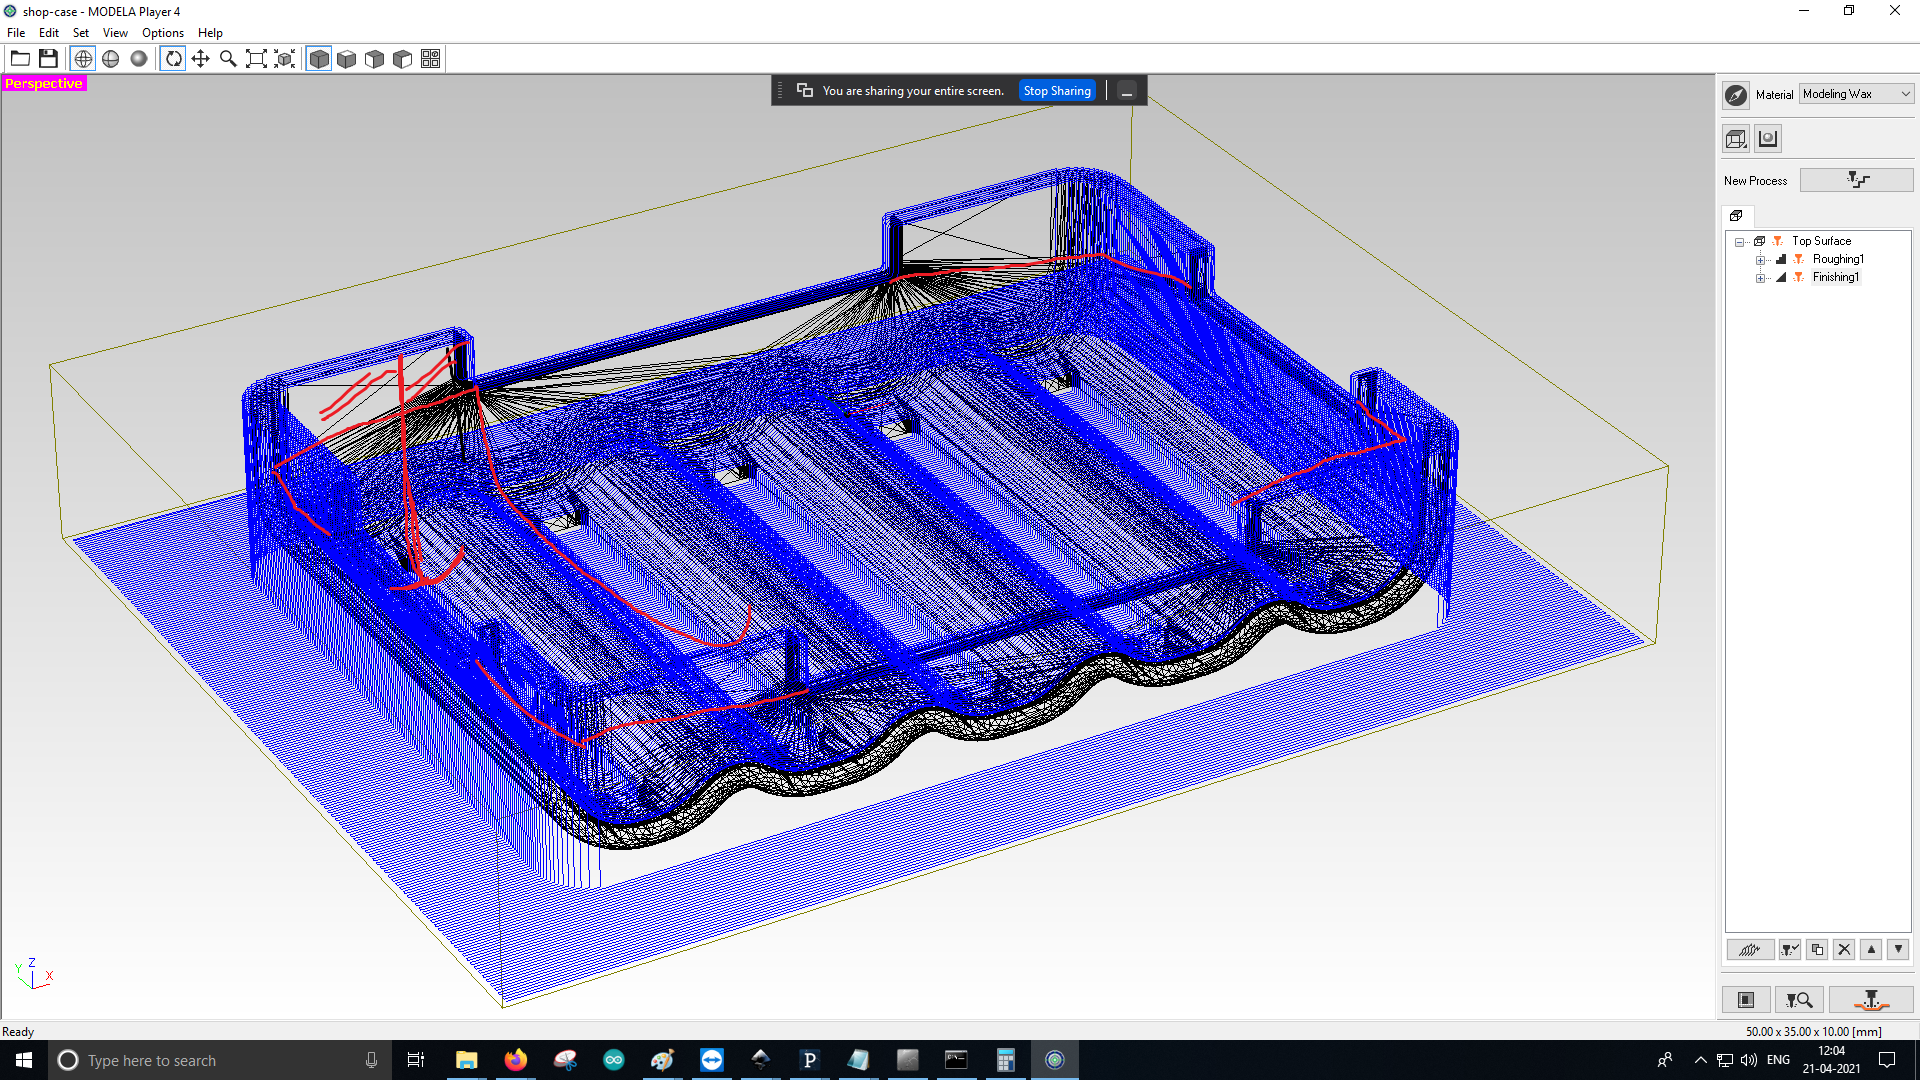
i am trying in ModelaPlayer4 but i face problem as both side in different place of wax the origin will change hence i asked sibu for any new software which could help
to make reverse both top and bottom of the object design.
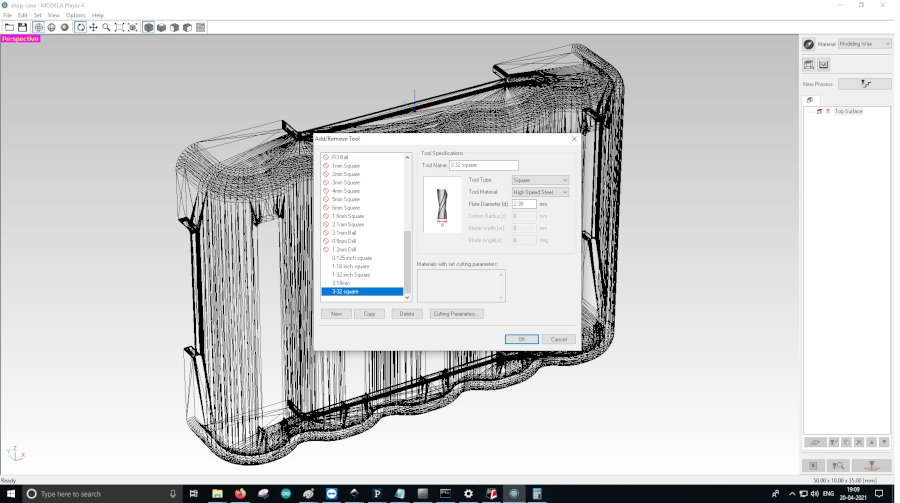
open the .stl file and click on new process, here the tool avilable in my lab need for drilling the wax 3/32 inch
set the origin for z-axis.


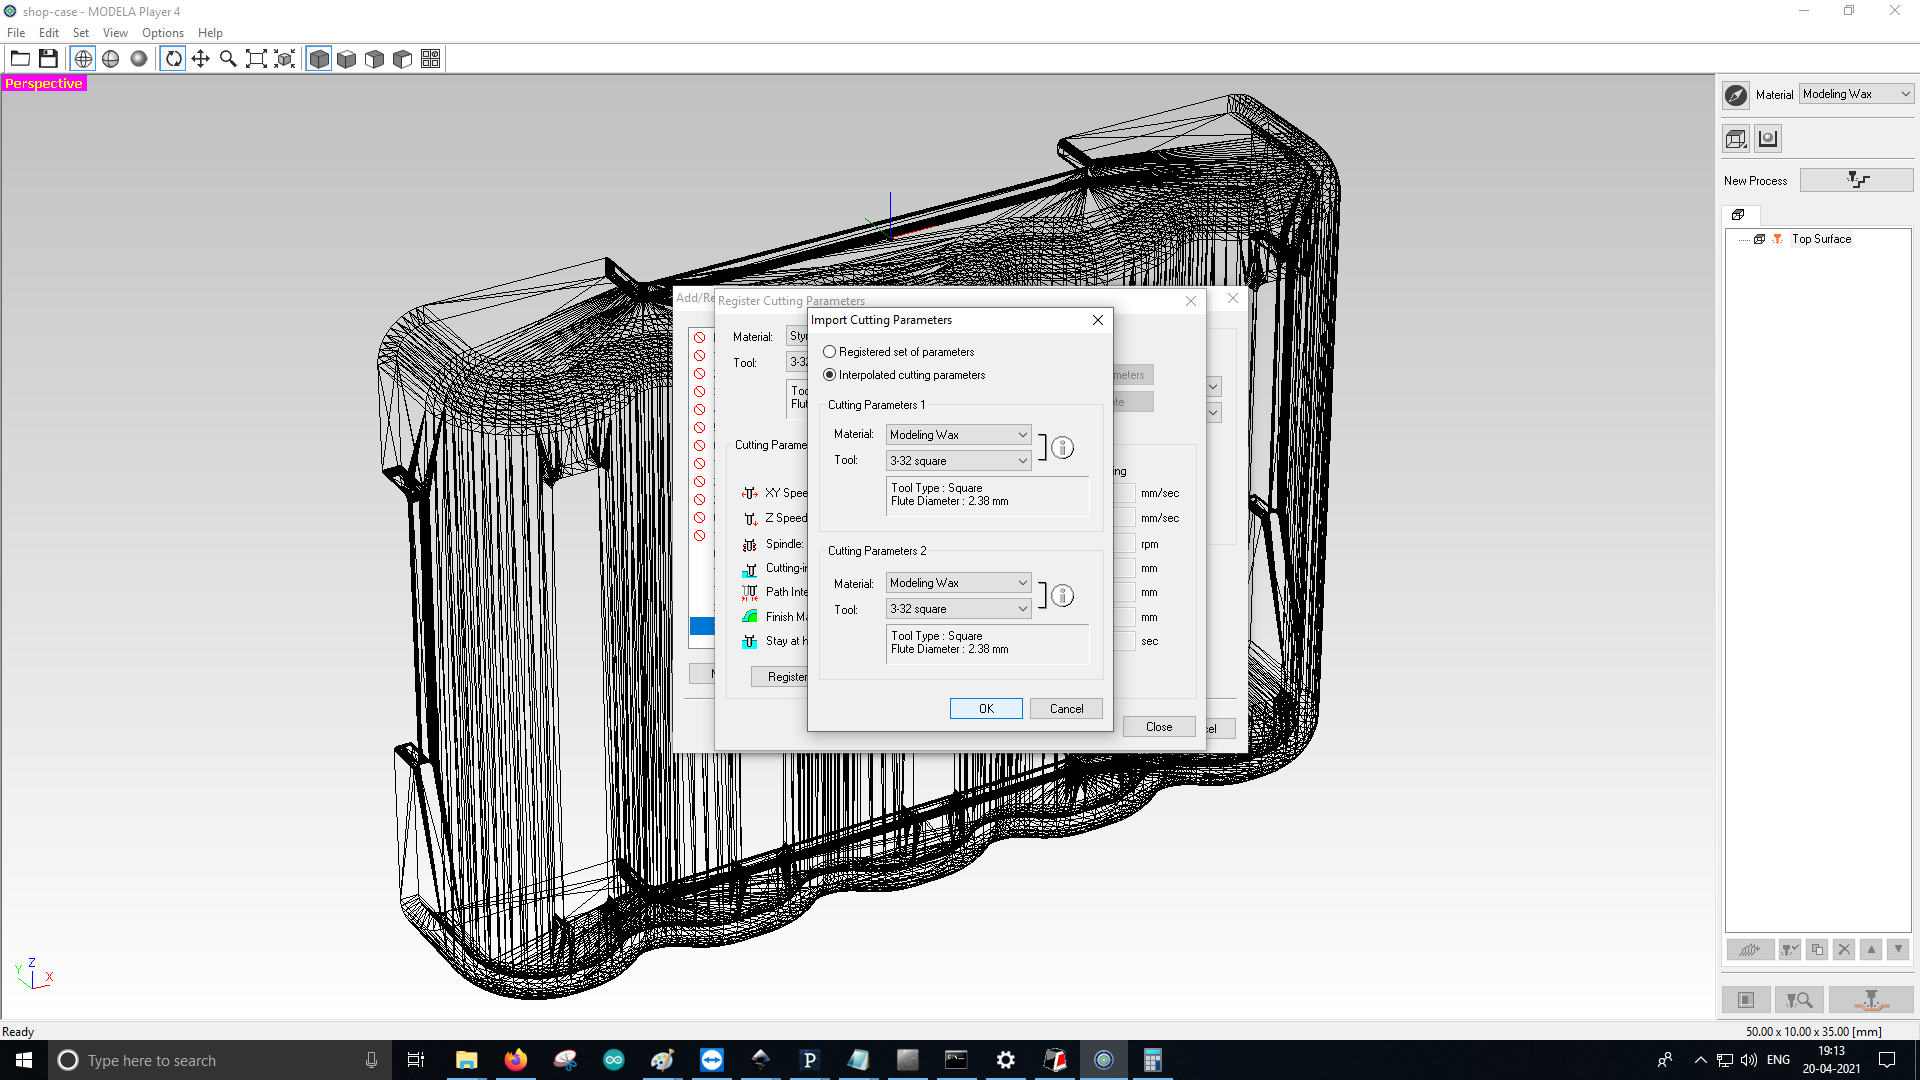
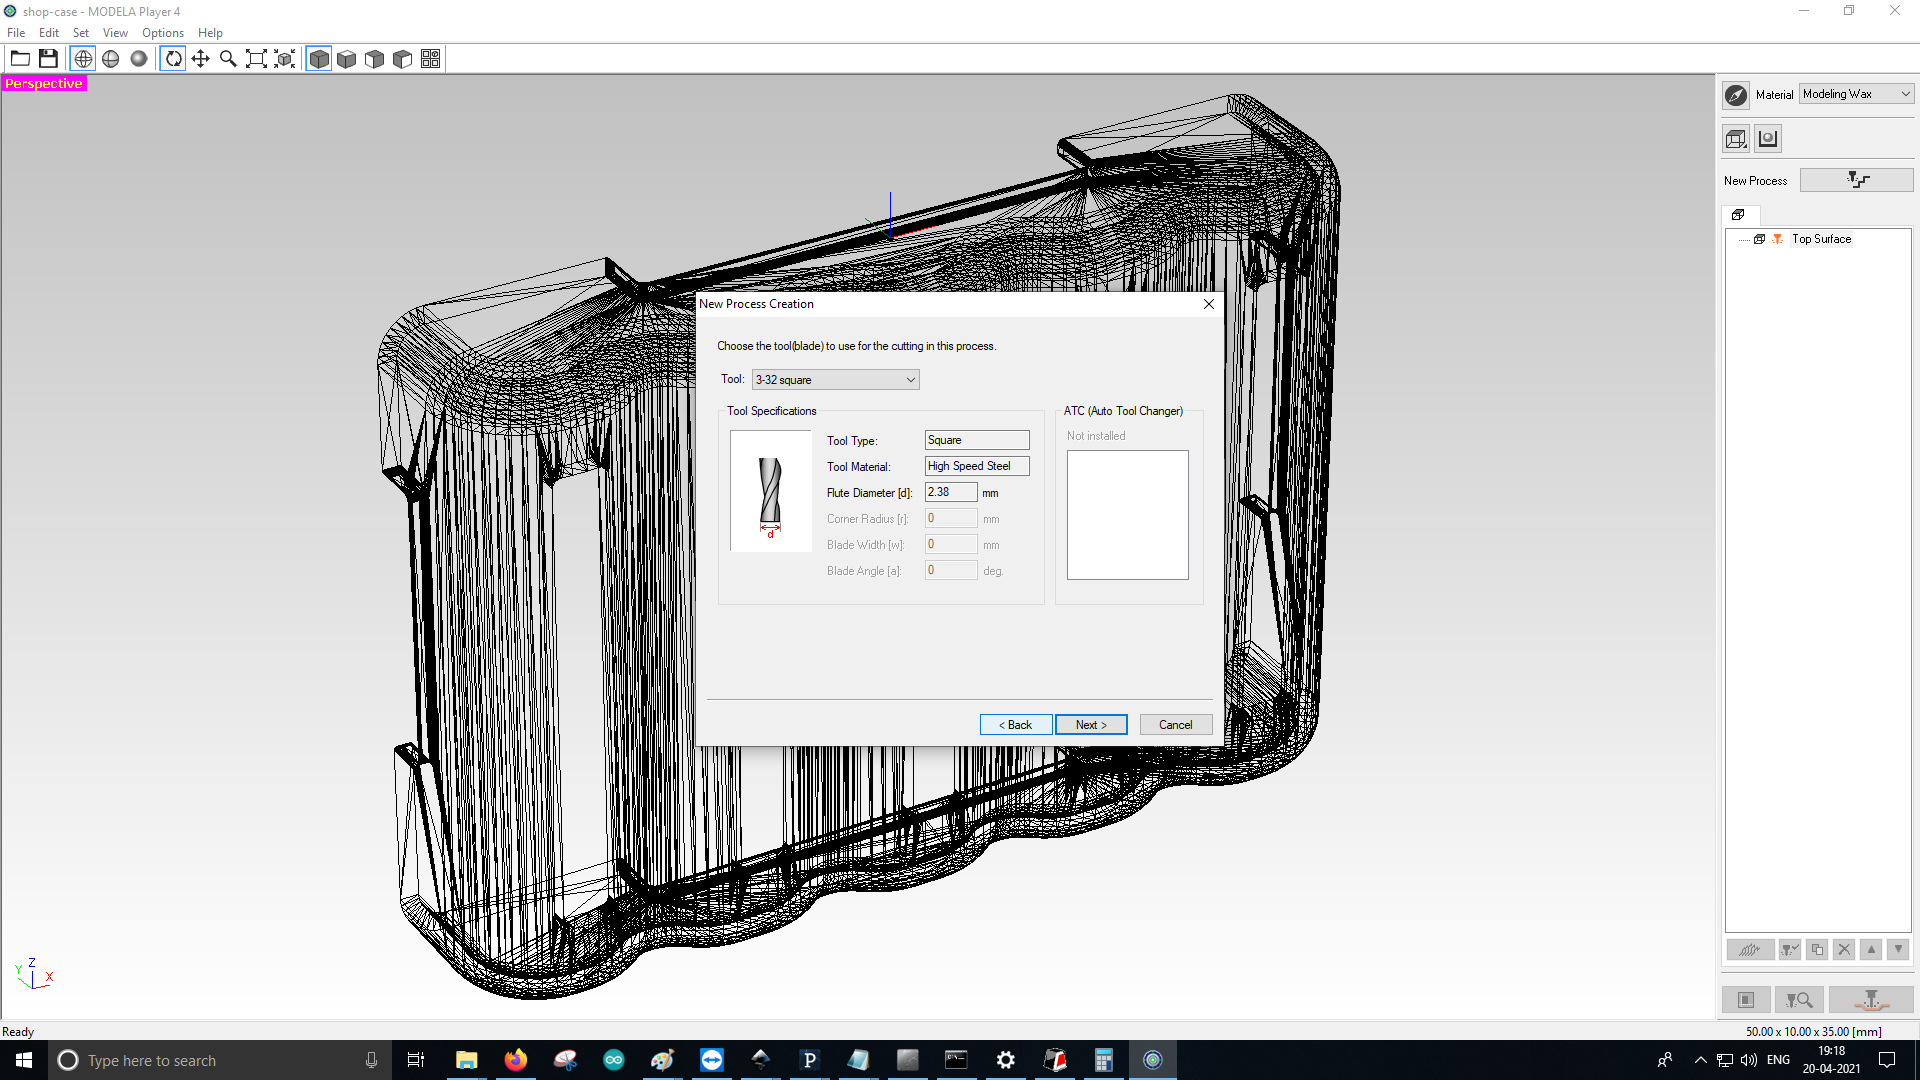
go to option new add tool and defined the tool specification. The tool registration with cutting parameters .

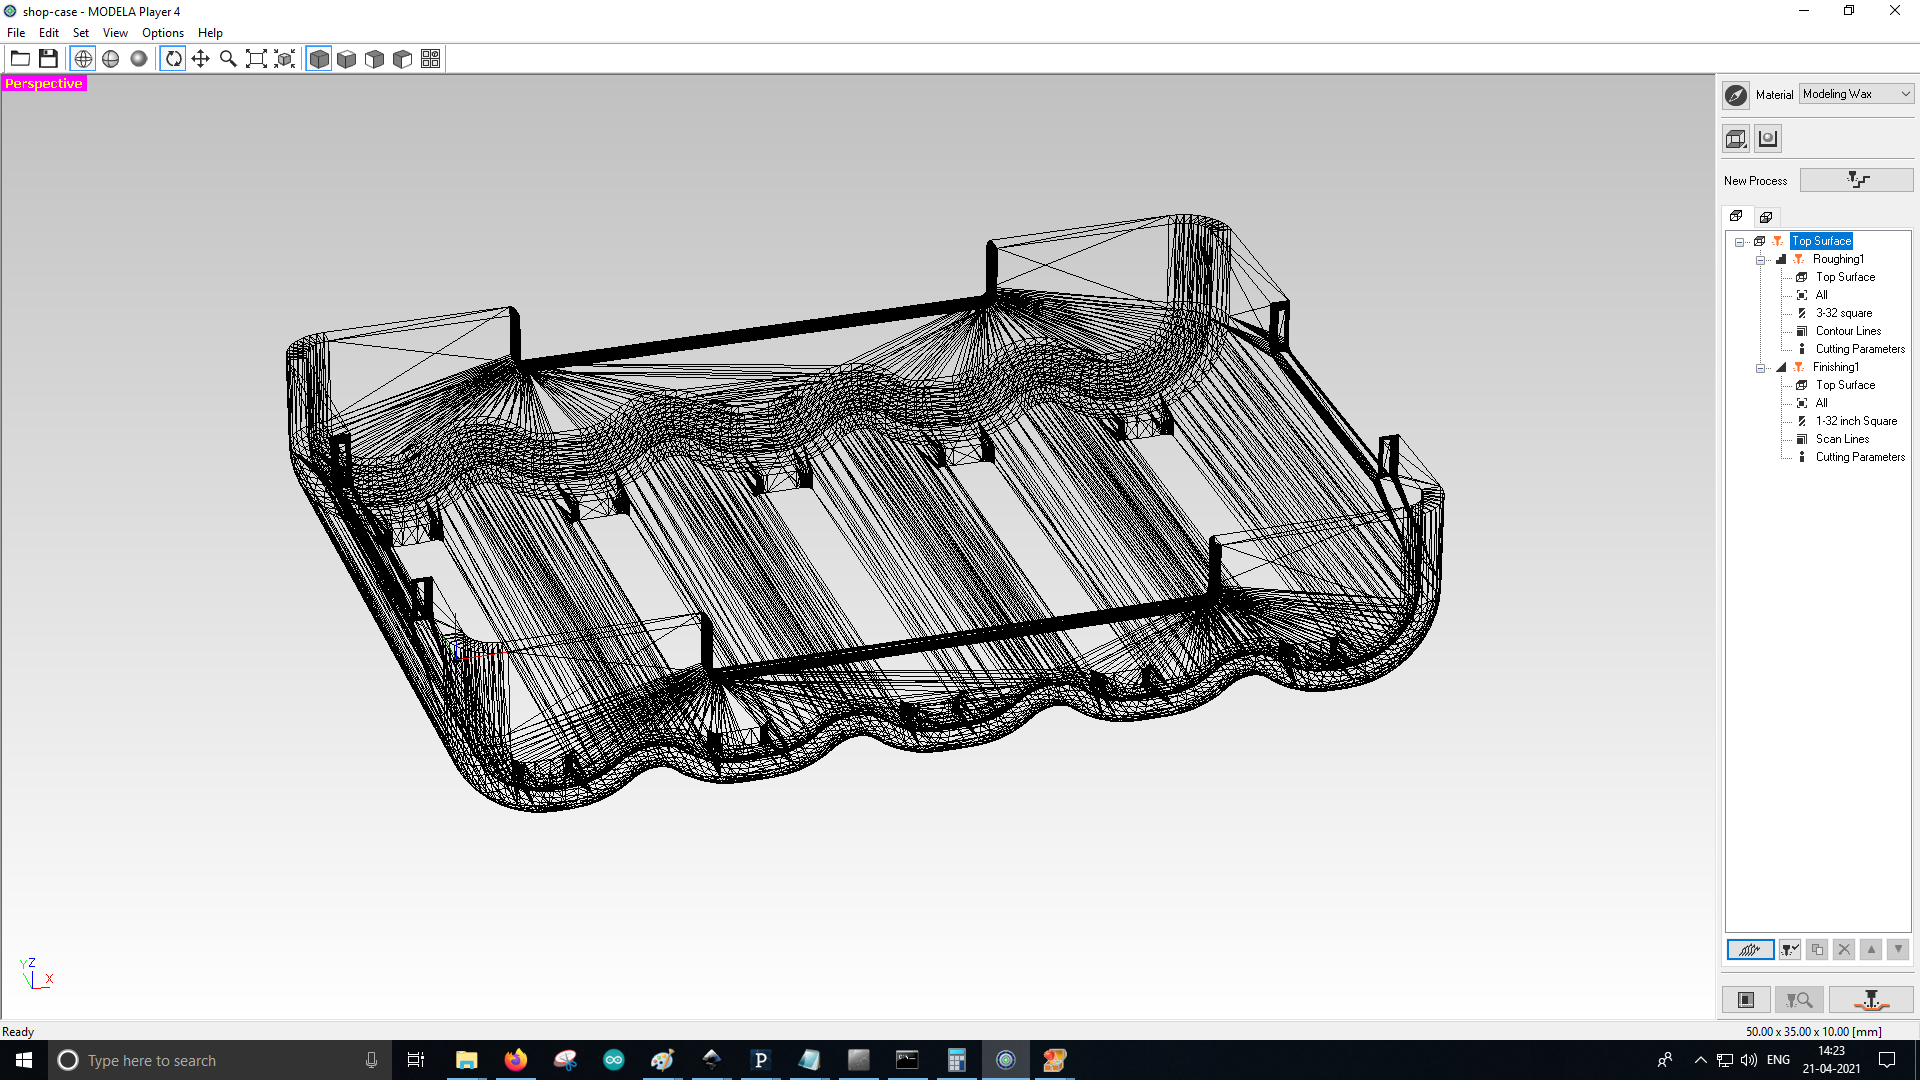
Creat the top roughing and finishing profile simillarly needs to creat the bottom roughing and finishing .

when creatin top and bottom it must be consider the x,y,z the design must be curve not perpendiculr cut and the z axis should not
be greater then the length of the bit. The combination of top and bottom must be syc in origin otherwise the result will be wrong
for casting

i tried in ModelaPlayer4 but i feel very much comfort in SRP so i milled through it
SRP Player
Roland’s SRP Player software enhances SRM-20 functionality and streamlines workflow, allowing users to get the most out their state-of-the-art mills. A powerful tool path engine optimizes path quality and tool approach, ensuring quality finishes and faster path calculation times. SRP Player also makes multiple tool path operations and progressive path simulations available to SRM-20 users through a built-in preview feature. Additionally, SRP Player software incorporates unique editing functions that let users explore new milling capabilities as their skills progress.
Roland SRP Player supports most popular CAD file formats, including STL, DXF, Rhino, 3D Model and IGES. New and existing monoFab SRM-20 owners can download SRP Player with a few clicks of the mouse through Roland’s included OnSupport software.
To learn more about SRP Player software for the Roland SRM-20 desktop milling machine, visit http://www.rolanddga.com/products/3d/srm20/.
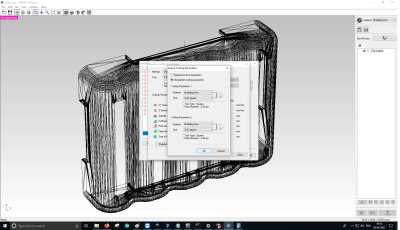
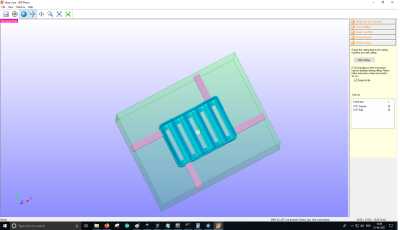
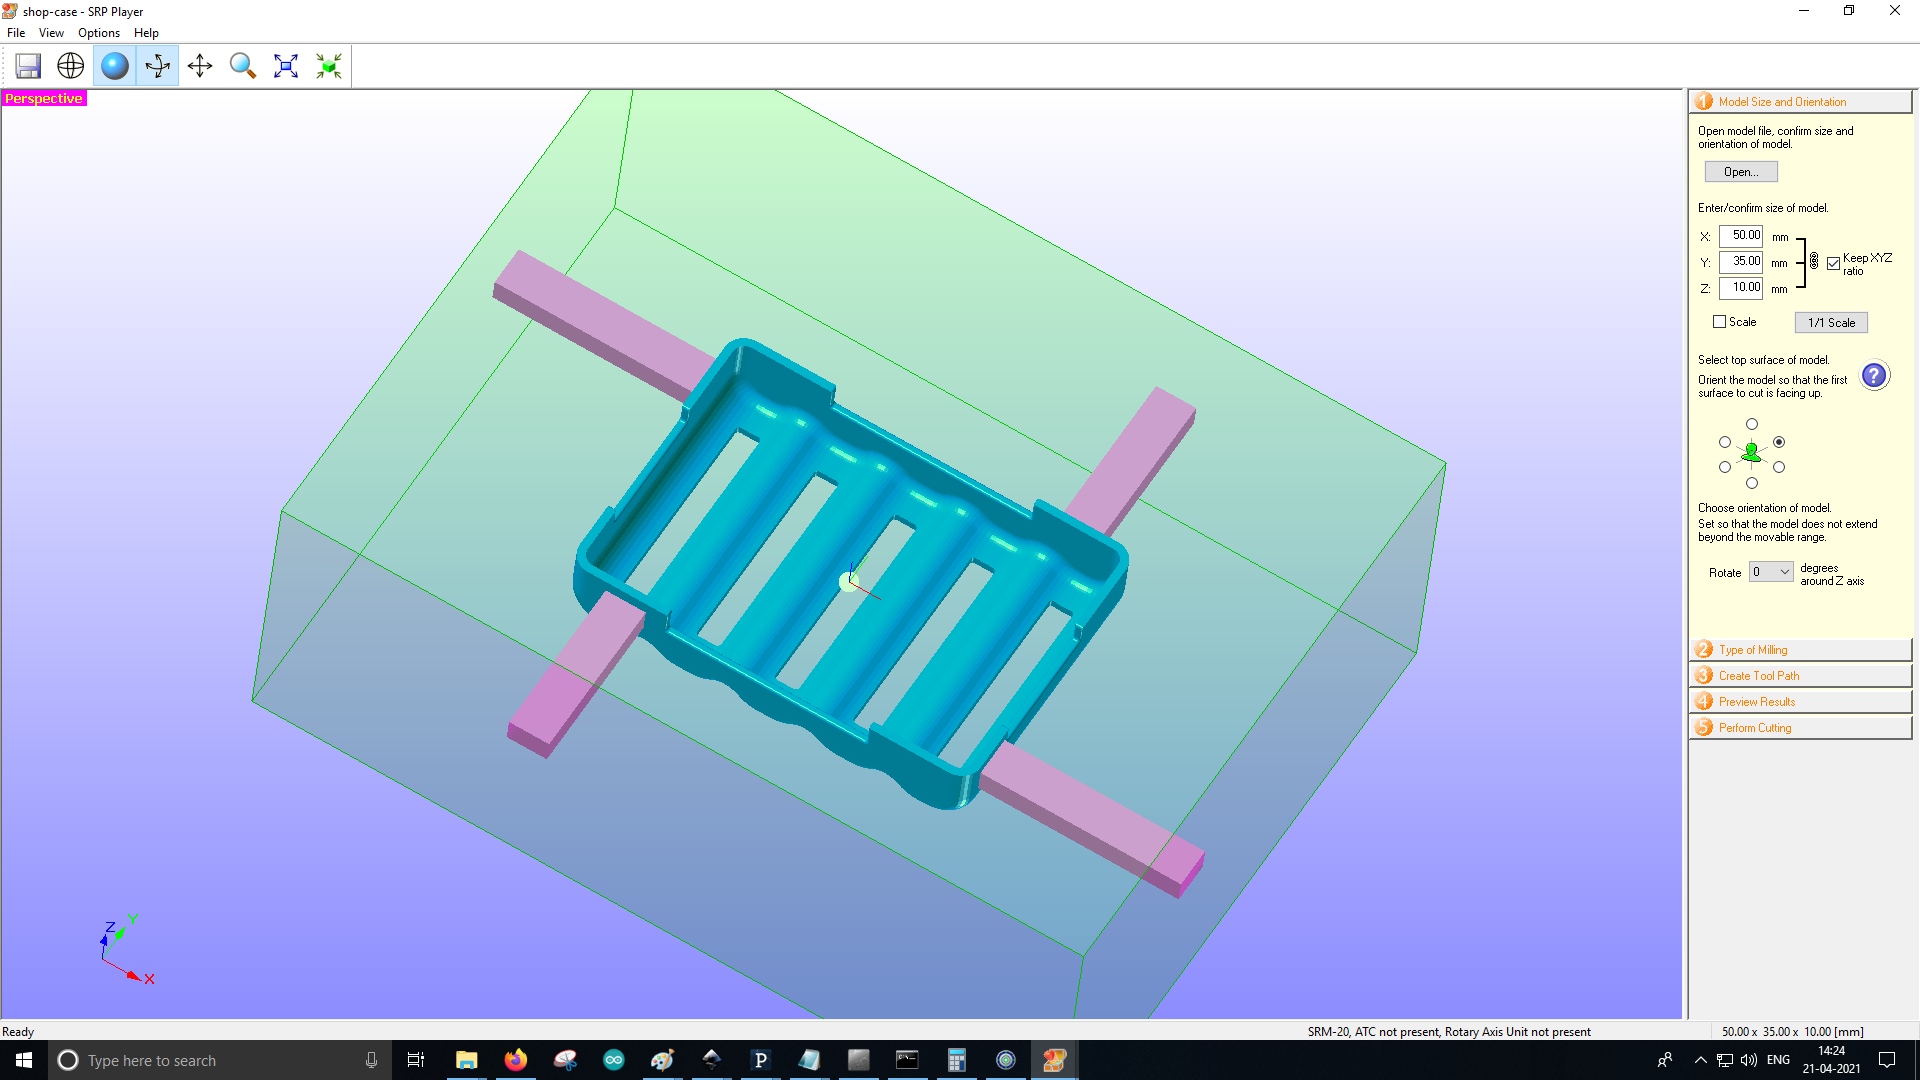
enter the size of the model, select the type of milling and defind the block work space


enter the size of the model, select the type of milling and defind the block work space

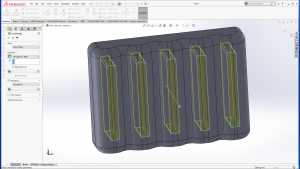
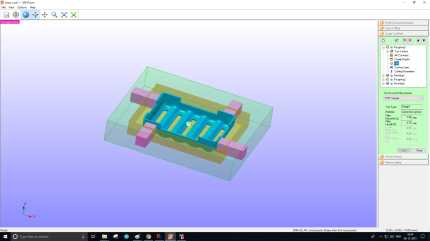
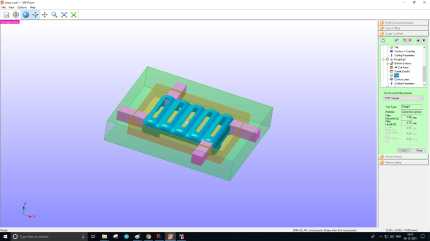
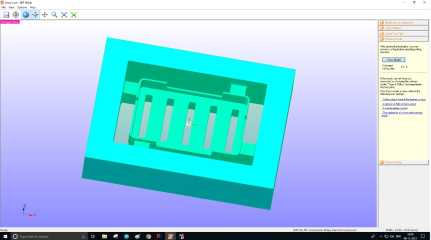
Creat Top Roughing and Top finishing part for the object


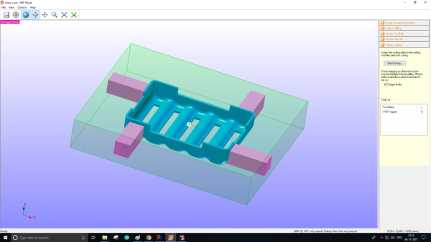
Creat Bottom Roughing and Top finishing part for the object the tool path selection.


Select the preview of the tool path and the cutting
In my fablab inventory the silicon rubber and epoxy was expired so my remote instructor suggest me to purchase from market. In the above SRP setting i did with help of remote instructor with help of remote instructor But i could not mill due lack of required materials for mold. Time is passing with so many incident happened in my life due to Covid with me and in my circumstances.
But this time i I go through the YouTube video i.e and creating the path file for top and bottom step by step which is Following
1. https://www.youtube.com/watch?v=OQTYSah8vdc&ab_channel=rolanddgasupport
2. https://www.youtube.com/watch?v=lx_VEpTaAek&ab_channel=rolanddgasupport
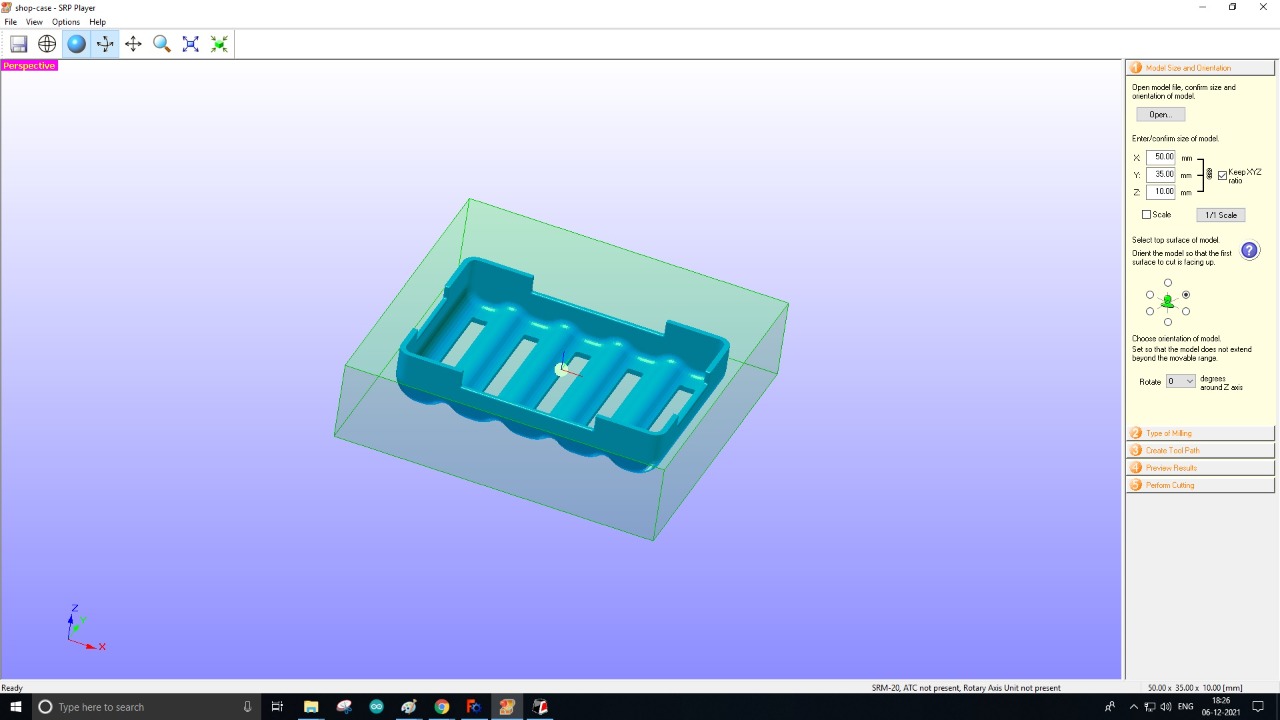
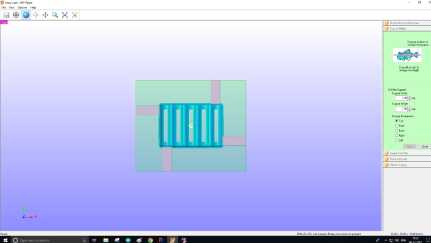
1. Model size and orientation:- Open SRP player click file and open select the .stl
file of design file.Adjust the axis x,y&z.
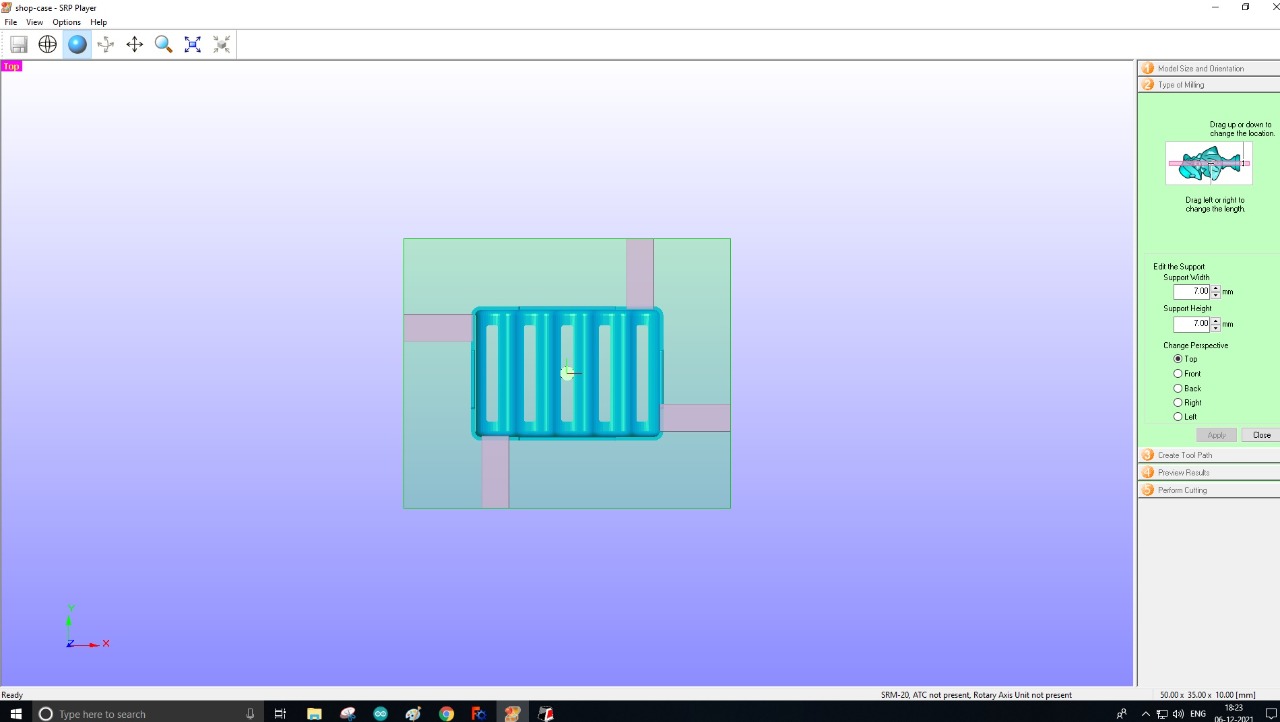
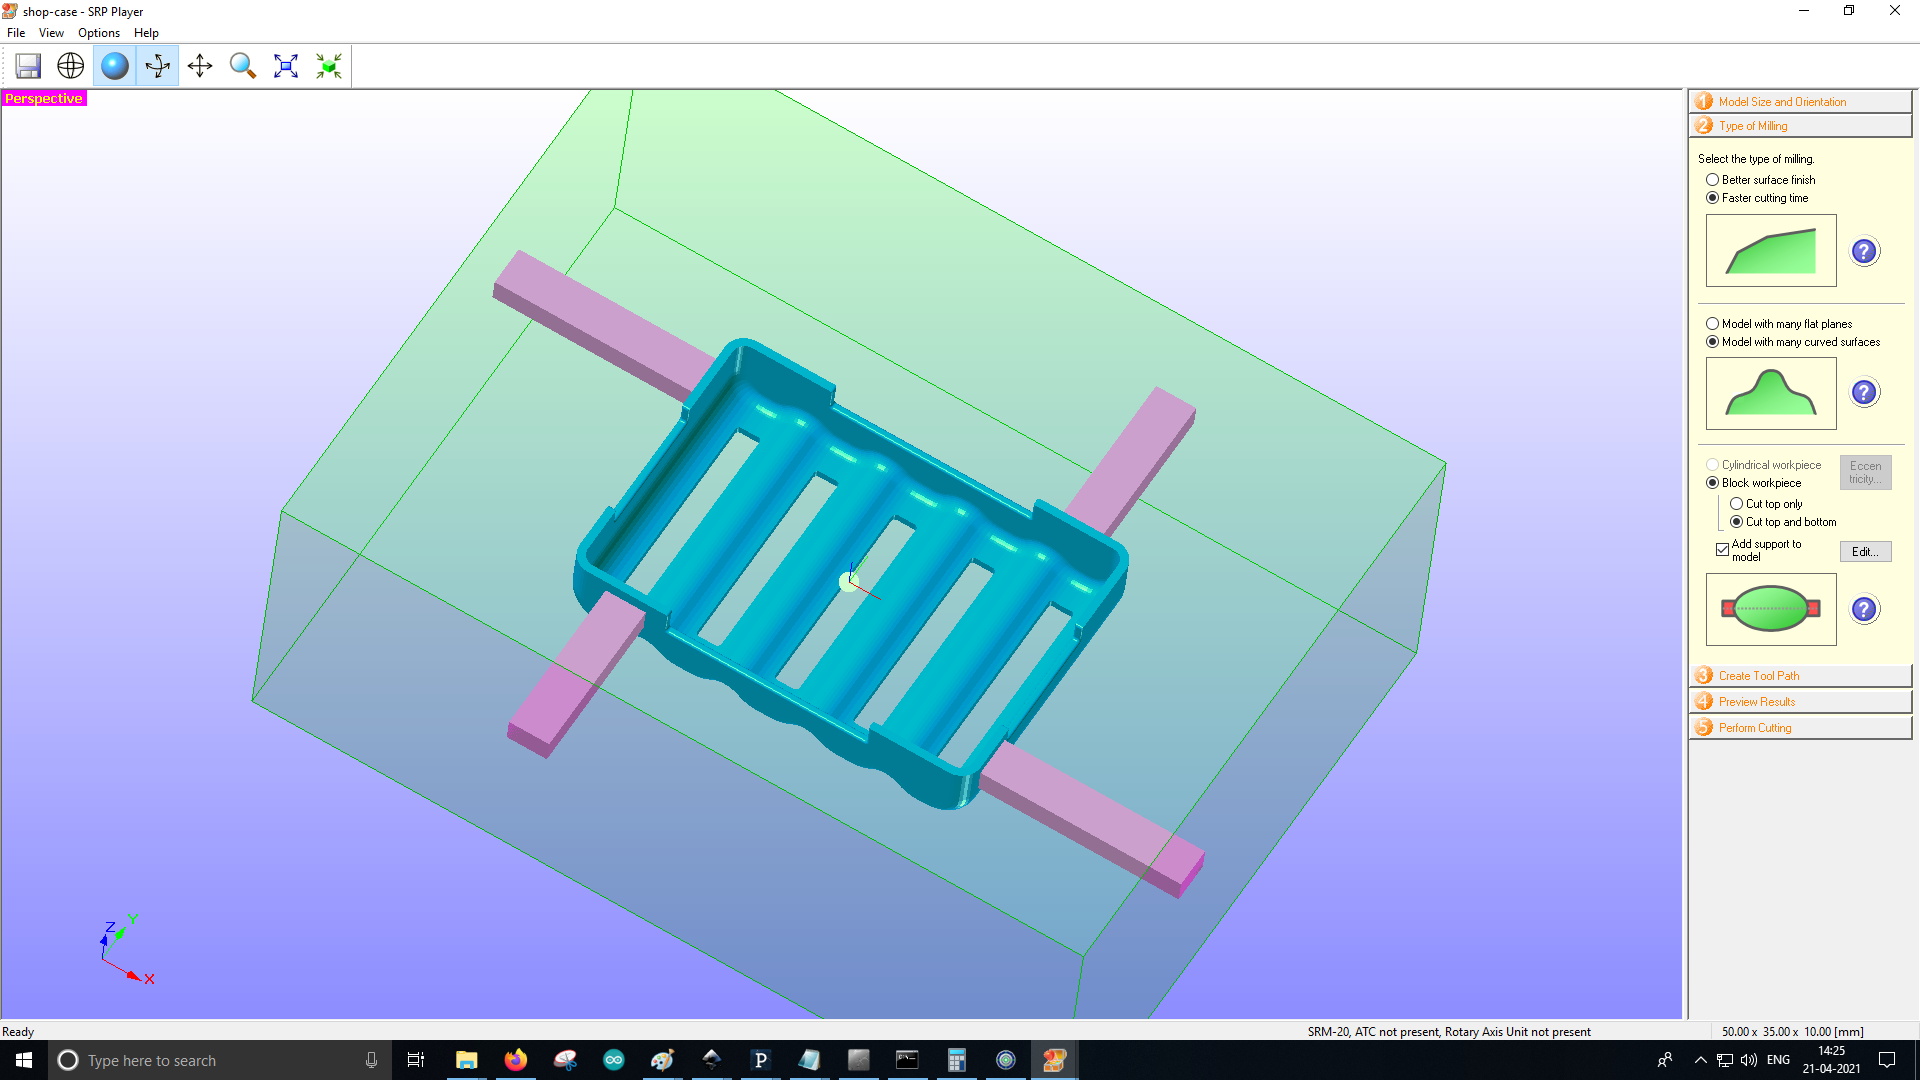
2. Type of Milling:- select the type of Milling. Here it is faster cutting time.select the Model with many curved surfaces
then select Block work piece i.e cut top and bottom.click support and edit for placing the support. Put
Support width and Support Height here i have given 7 mm.
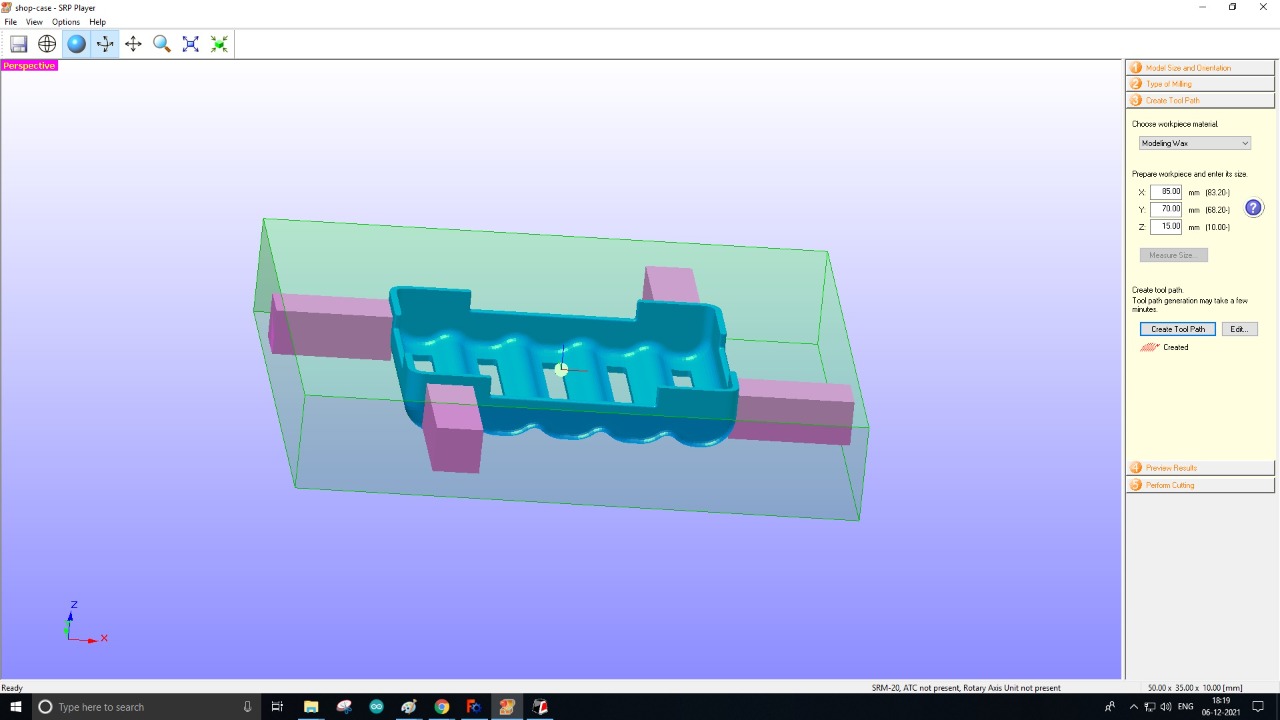
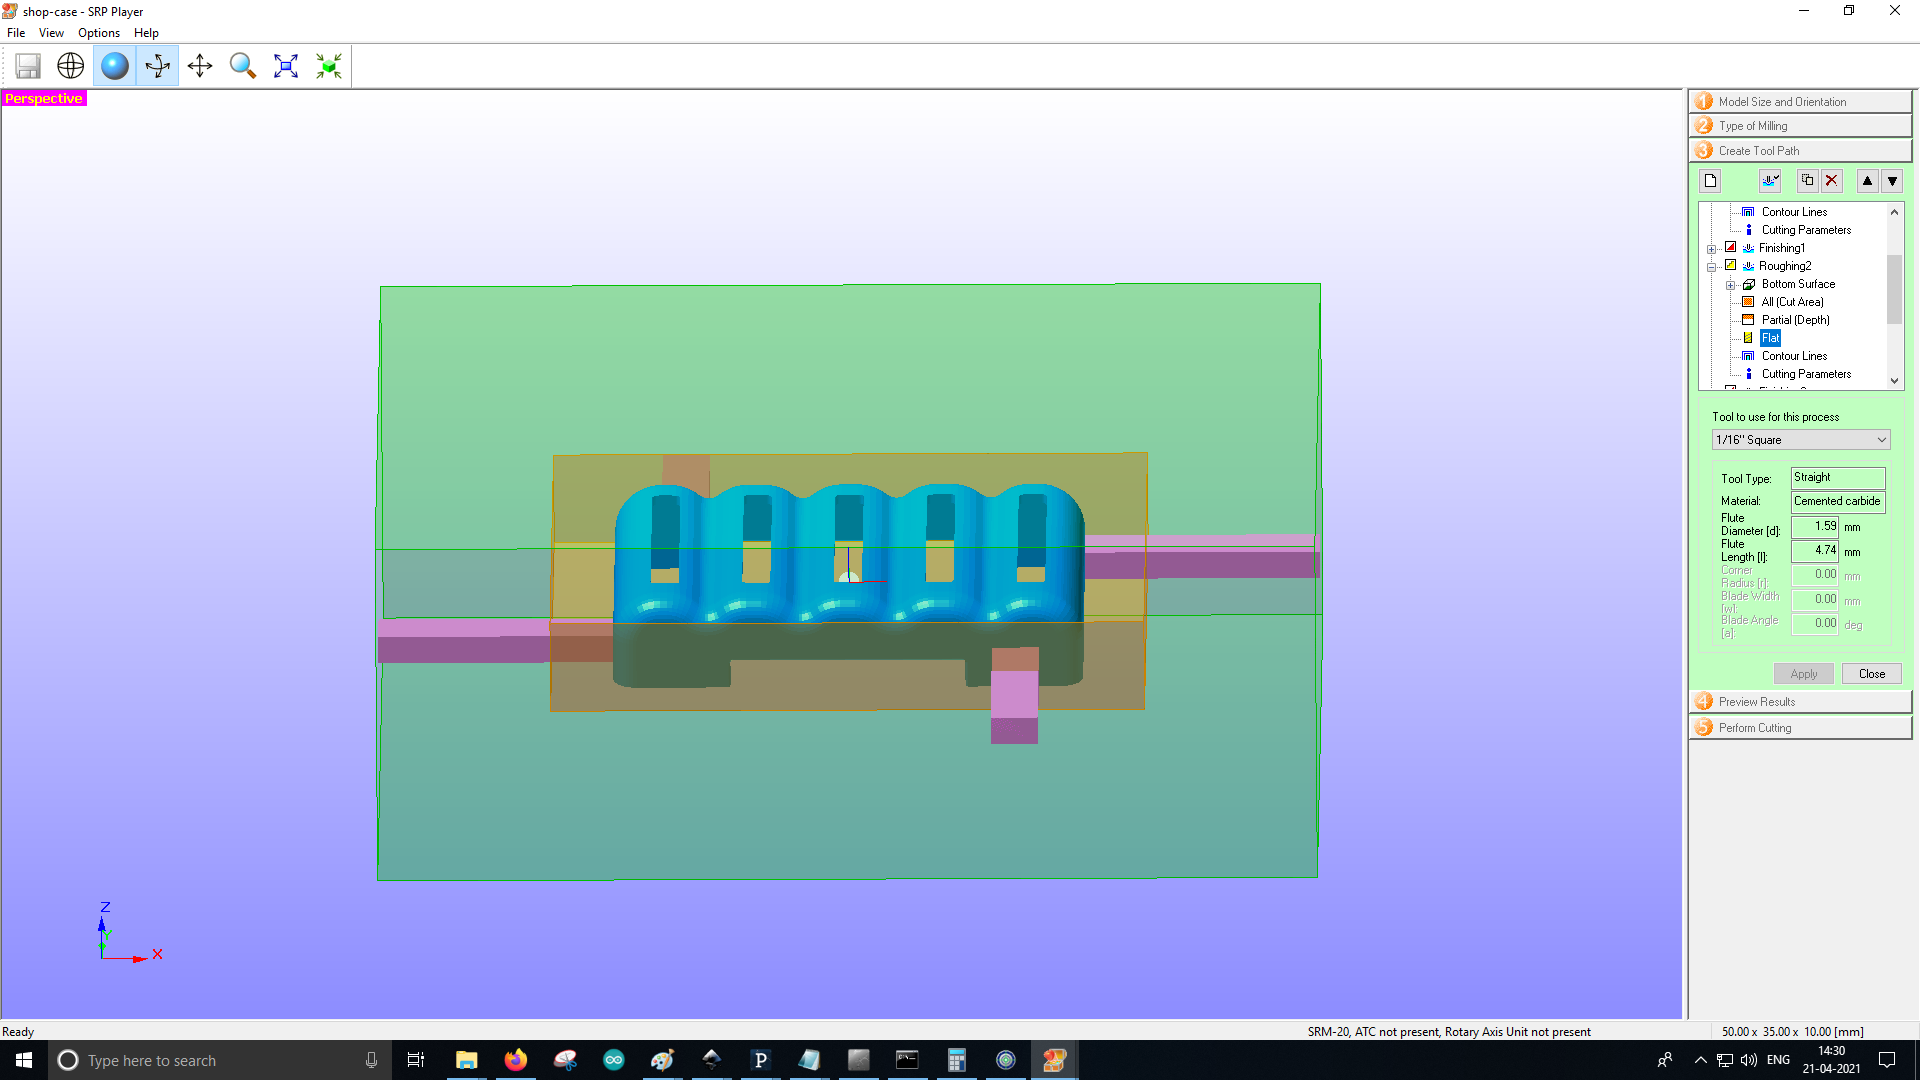
3. Create Tool Path:- Initial creating tool path select the work piece material,here
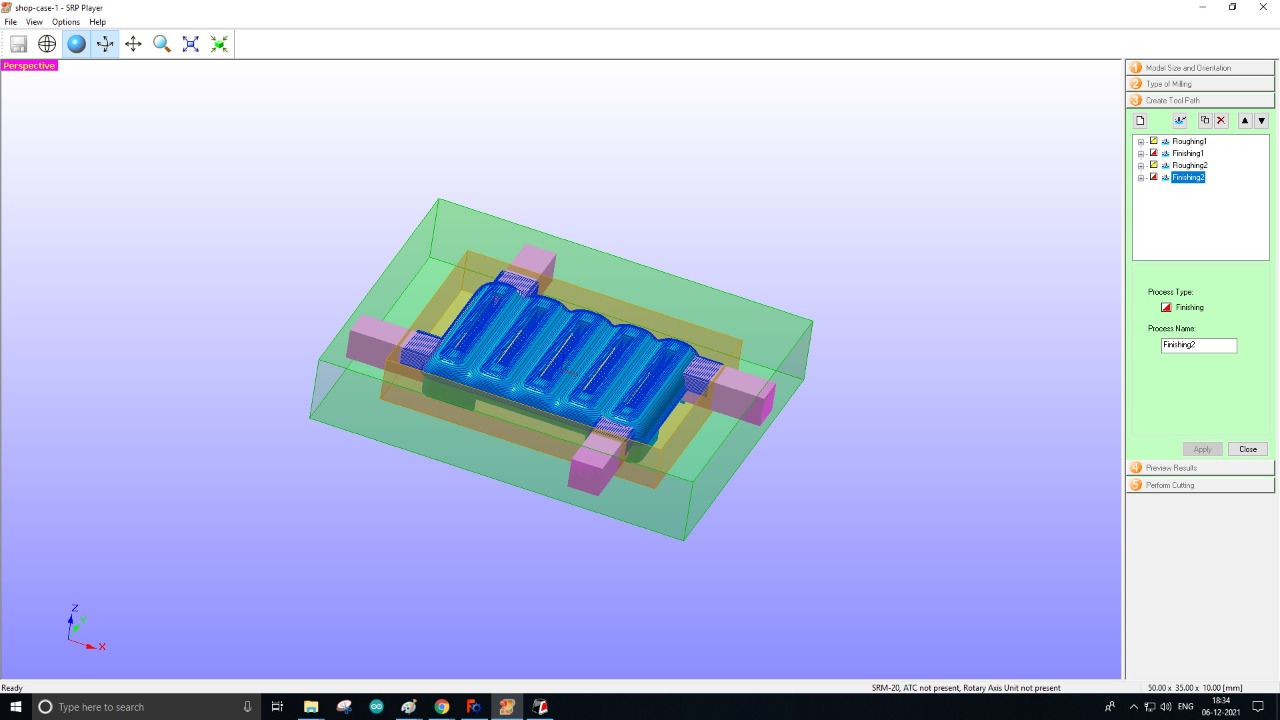
i have taken Modelling wax and select the work piece parameter i.e x,y &Z.For selection milling bit edit then in create tool path section there will be (Roughing1, Finishing1) for top and (Roughing2,Finishing2) for bottom
Here it needs to select the tool which will use here i have select 1/16" square as i have connect this bit 1/16" in SRM


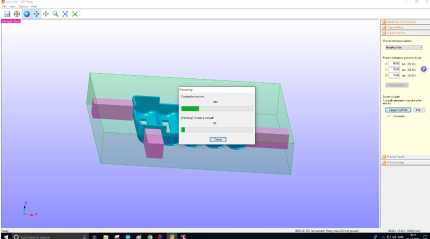
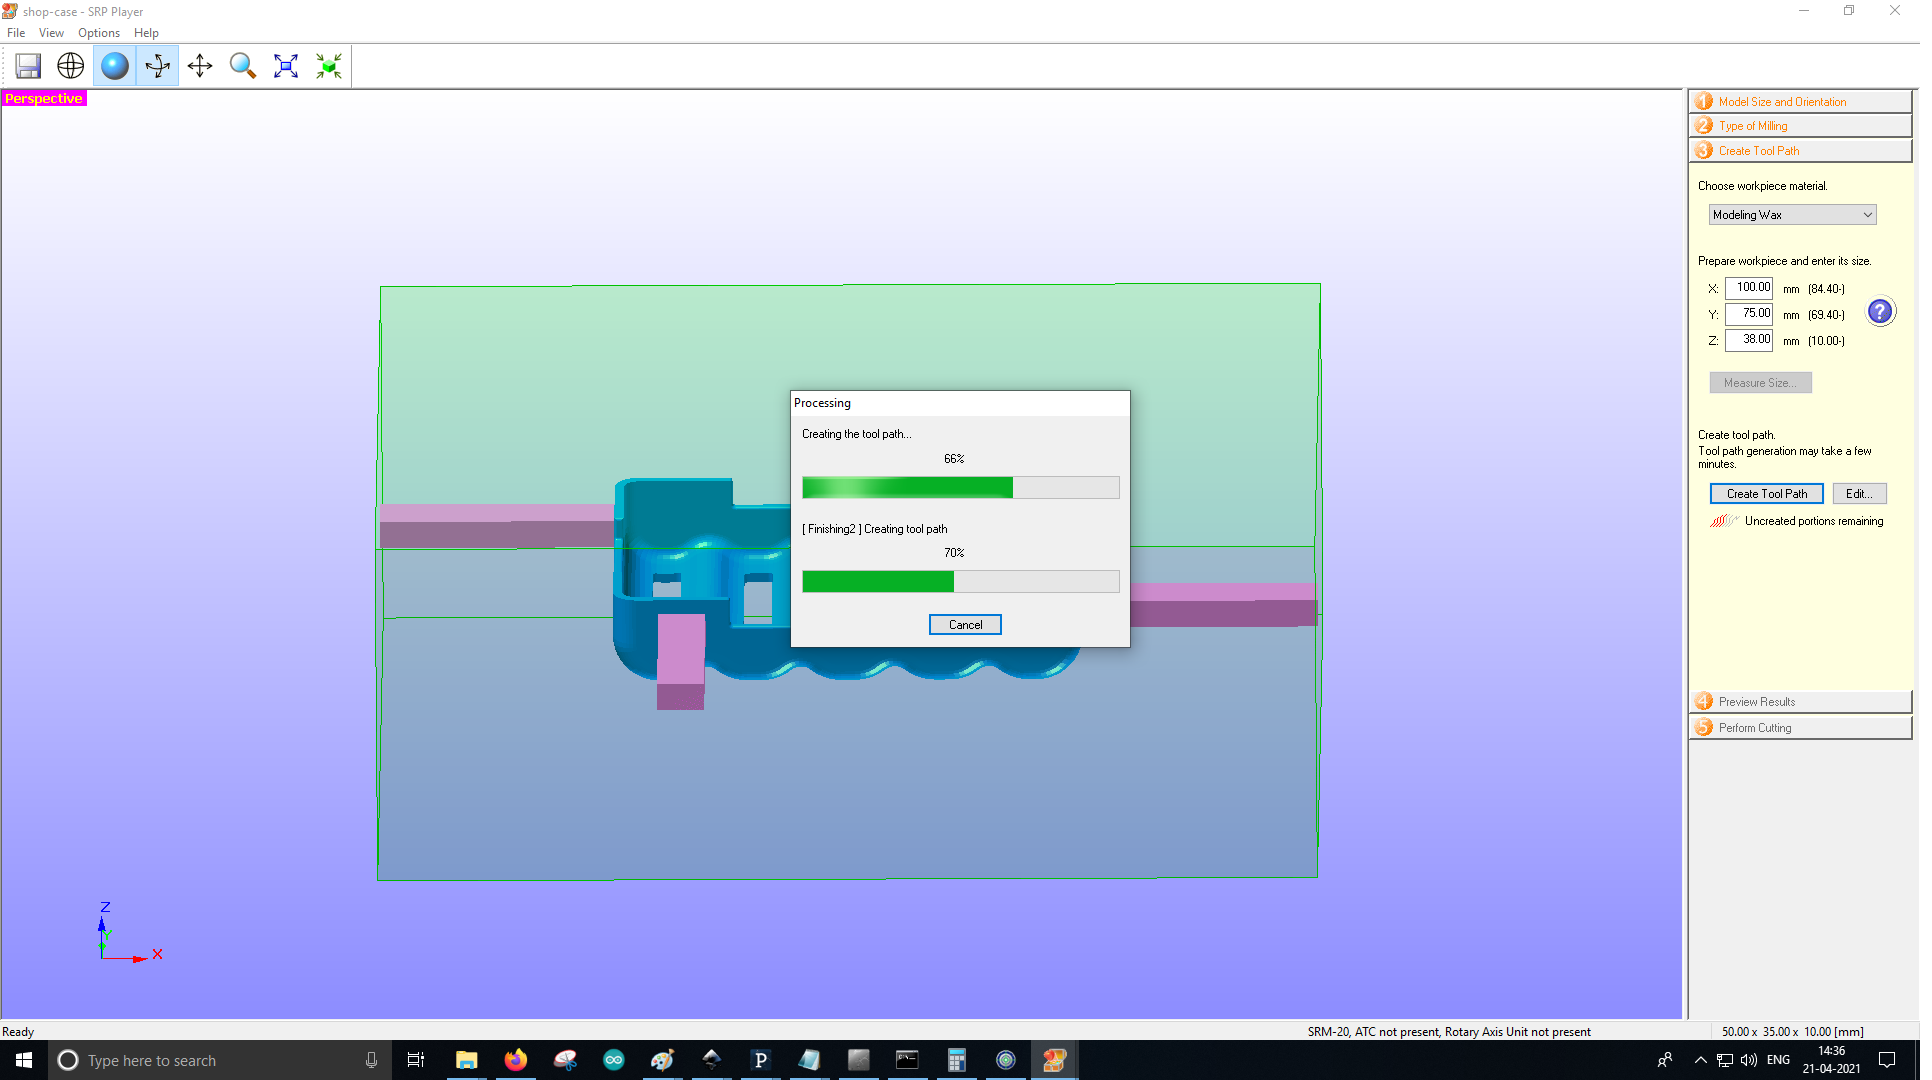
Now Create Tool Path Once the tool bit selected then close and click the create tool path.After tool path creating below of create tool
path option it will show created.
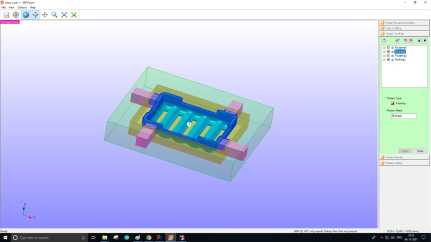
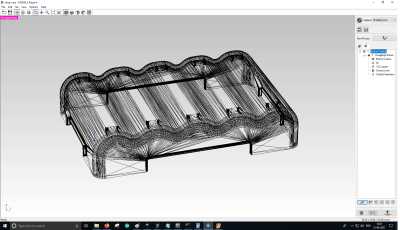
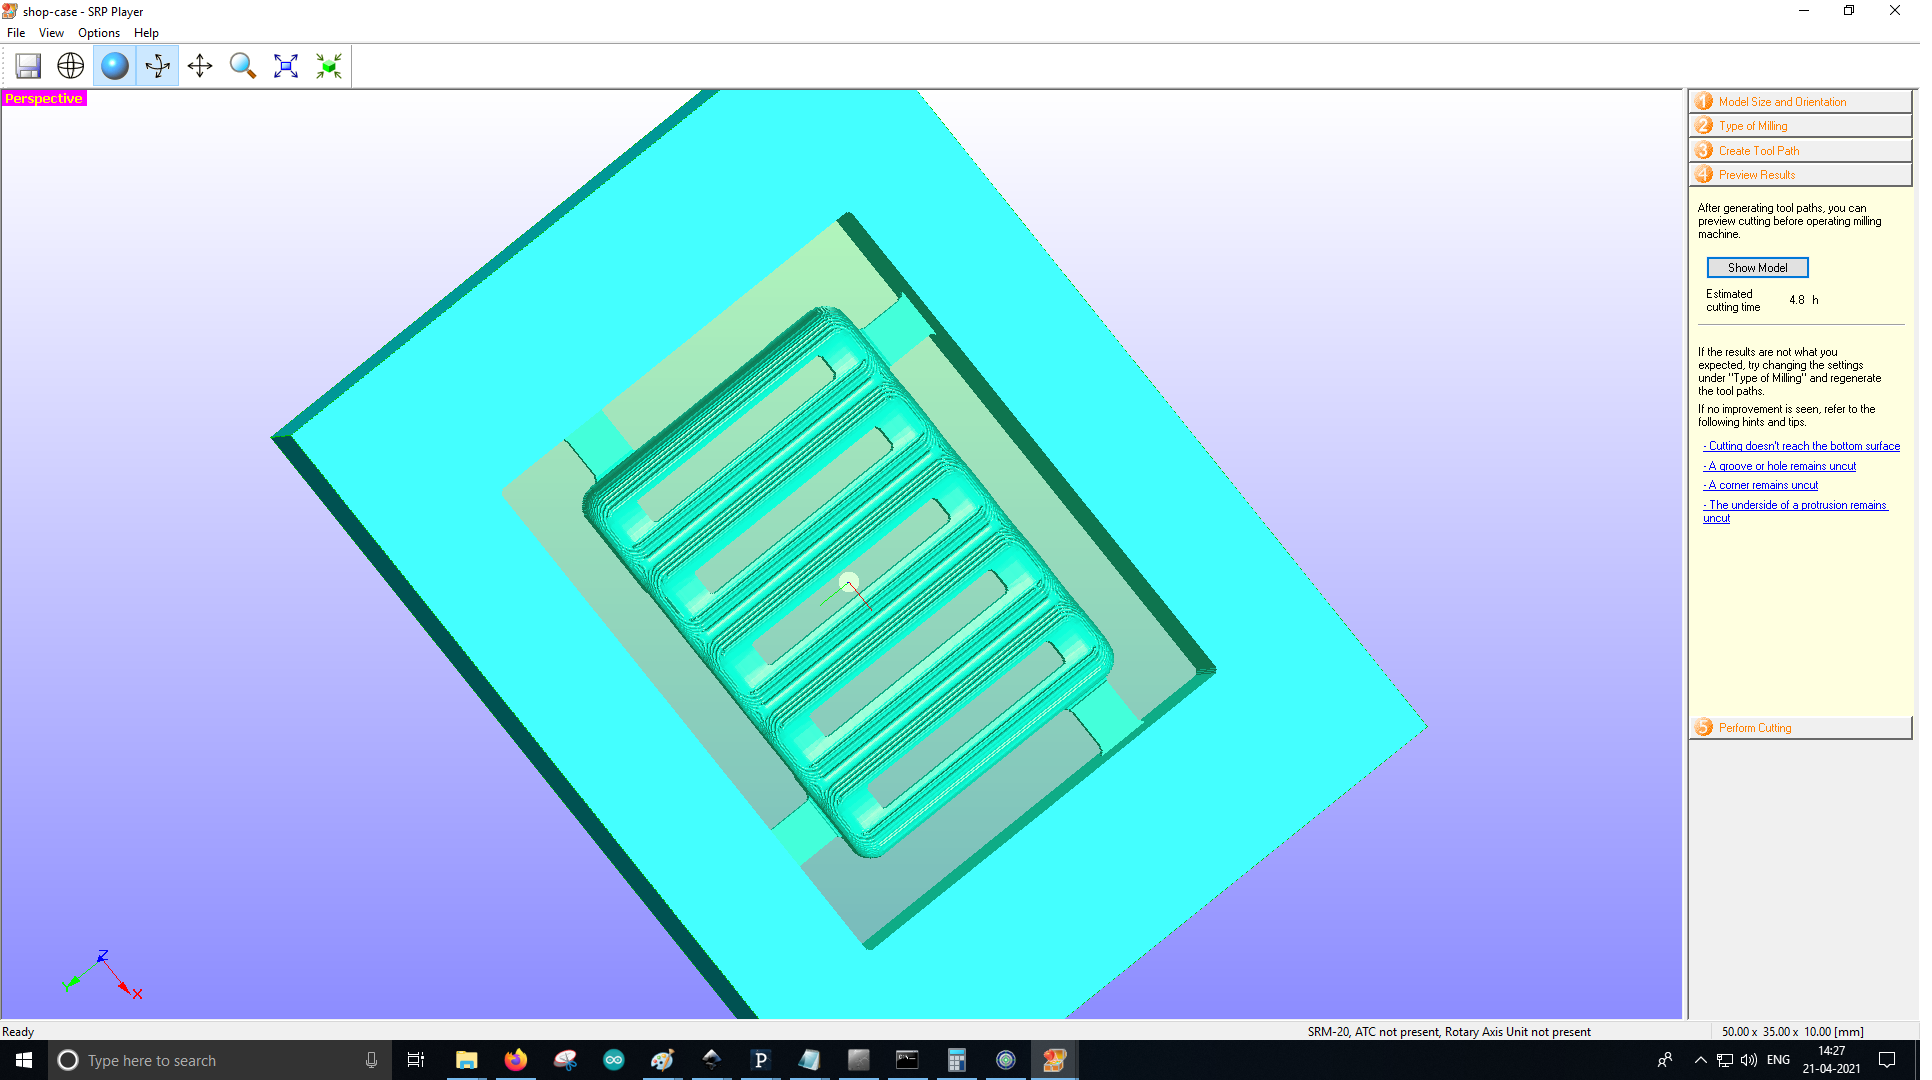
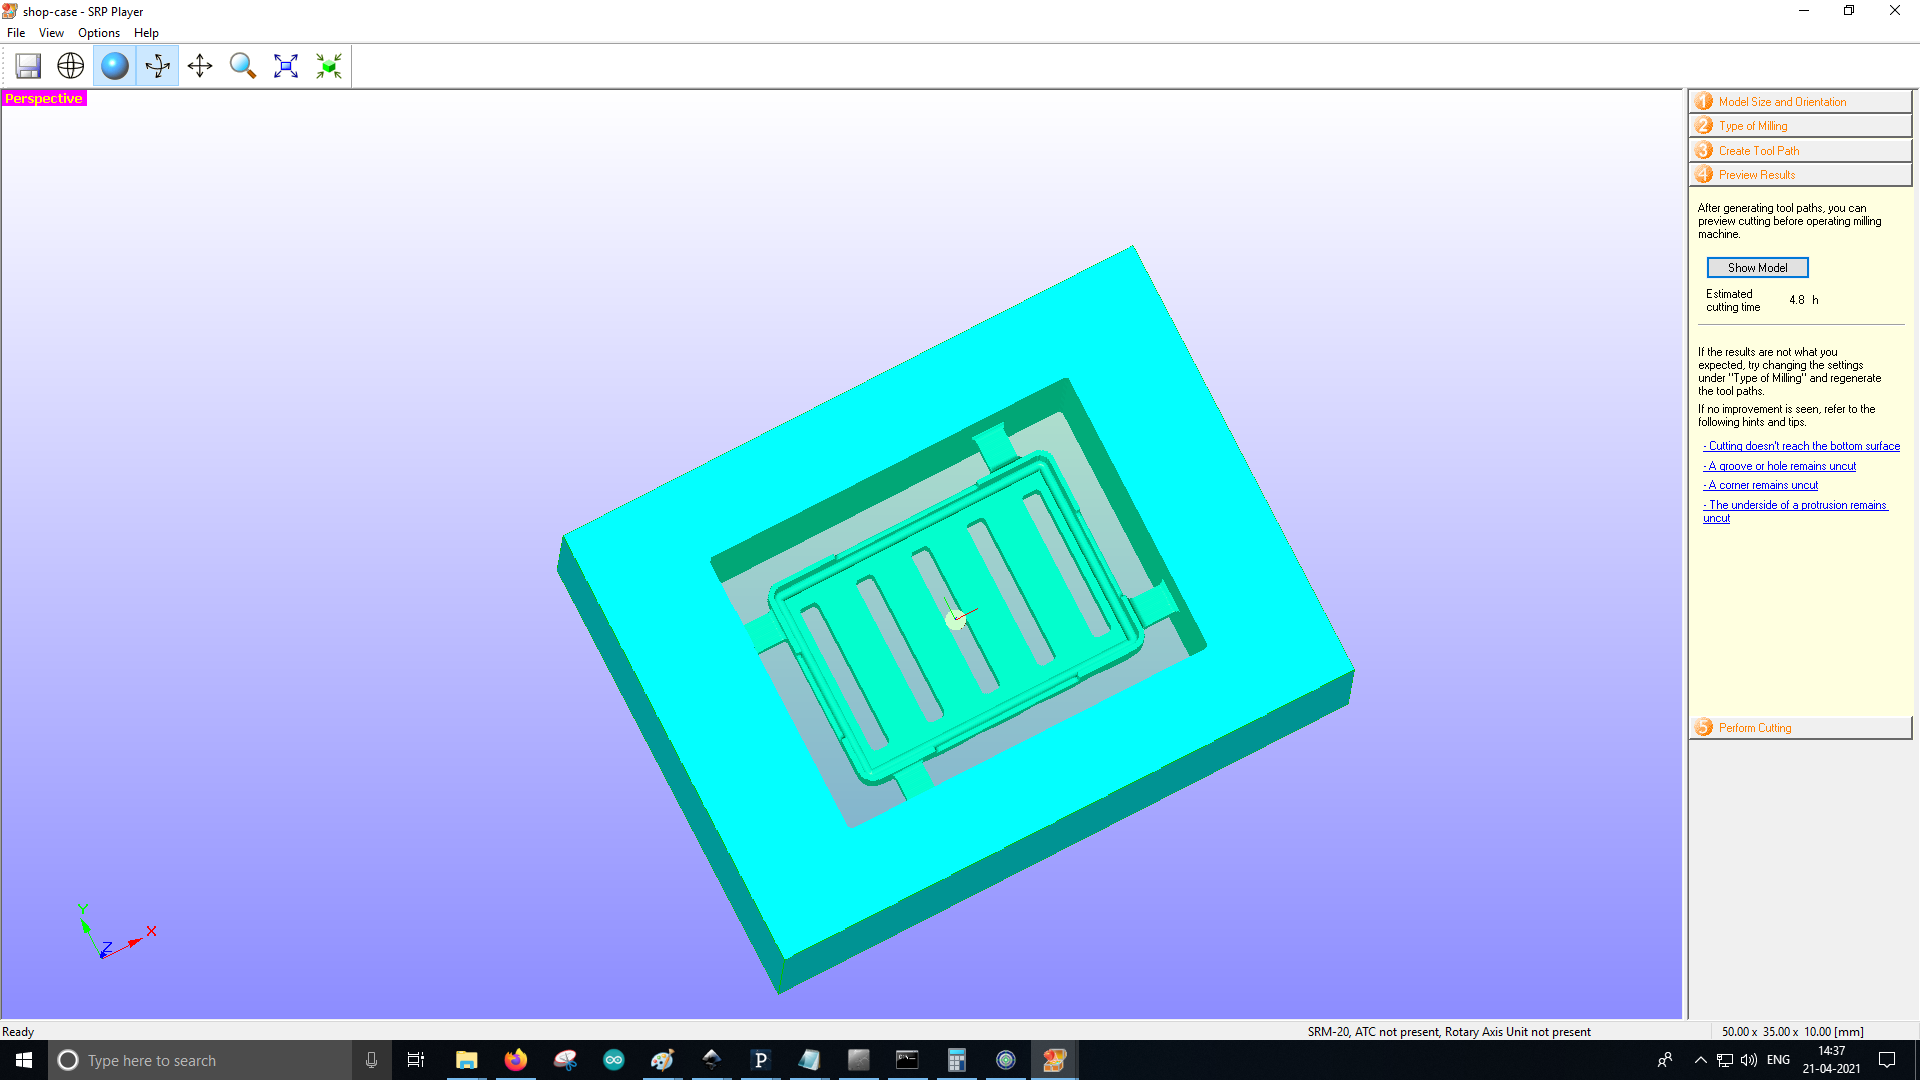
4. Preview Results In preview option will show how the output after milling with the my created tool path. It is very important where it can found whether my milling is perfect as per my design.
5.Perform cutting After generating the tool path it need to download the output files for top i.e Roughing1 Finishing1
and for Bottom Roughing2,Finishing2
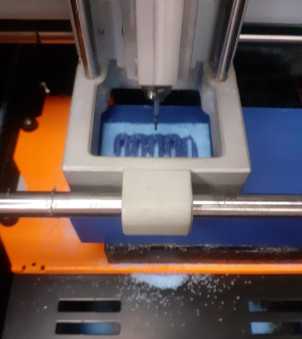
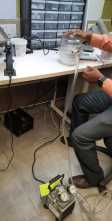
vpanel for srm-20 Once i have been download the the output toolpath files now i have to place work piece in SRM with double side adhesive paper
Then i have to open Vpanel as i have work in PCB milling so i have easy for set x,y,z it need to ensure that vpanel is selected origin user coordinate.
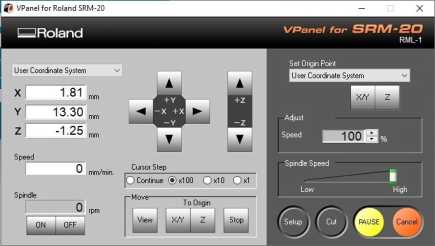
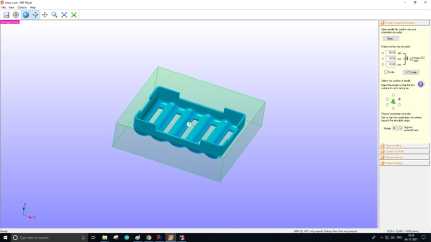
after setting Vpanel origin for milling with SRM 20 select top file Roughing1 after complete of Roughing select Finishing1
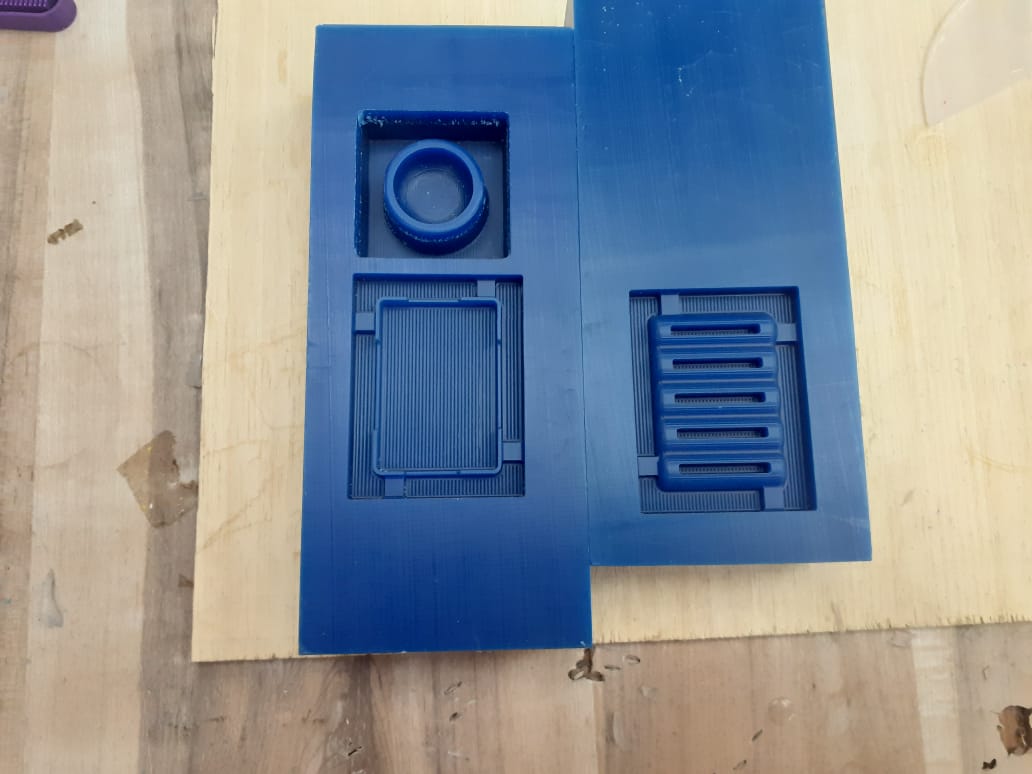
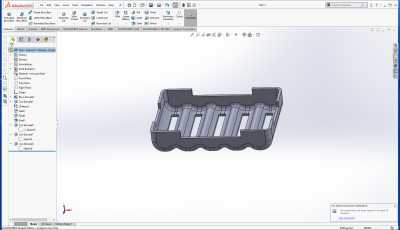
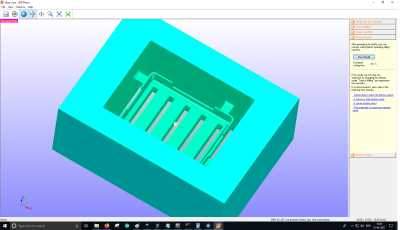
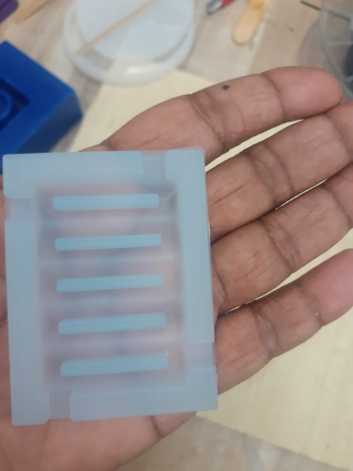
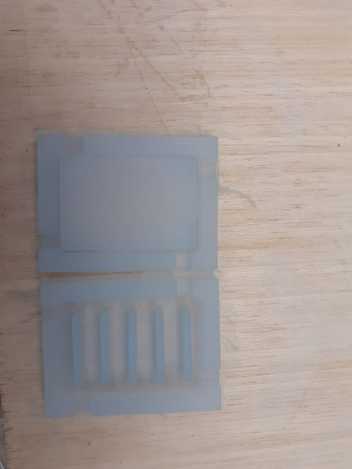
same in case of bottom milling and Here is the final Result of Top and Bottom after milling..

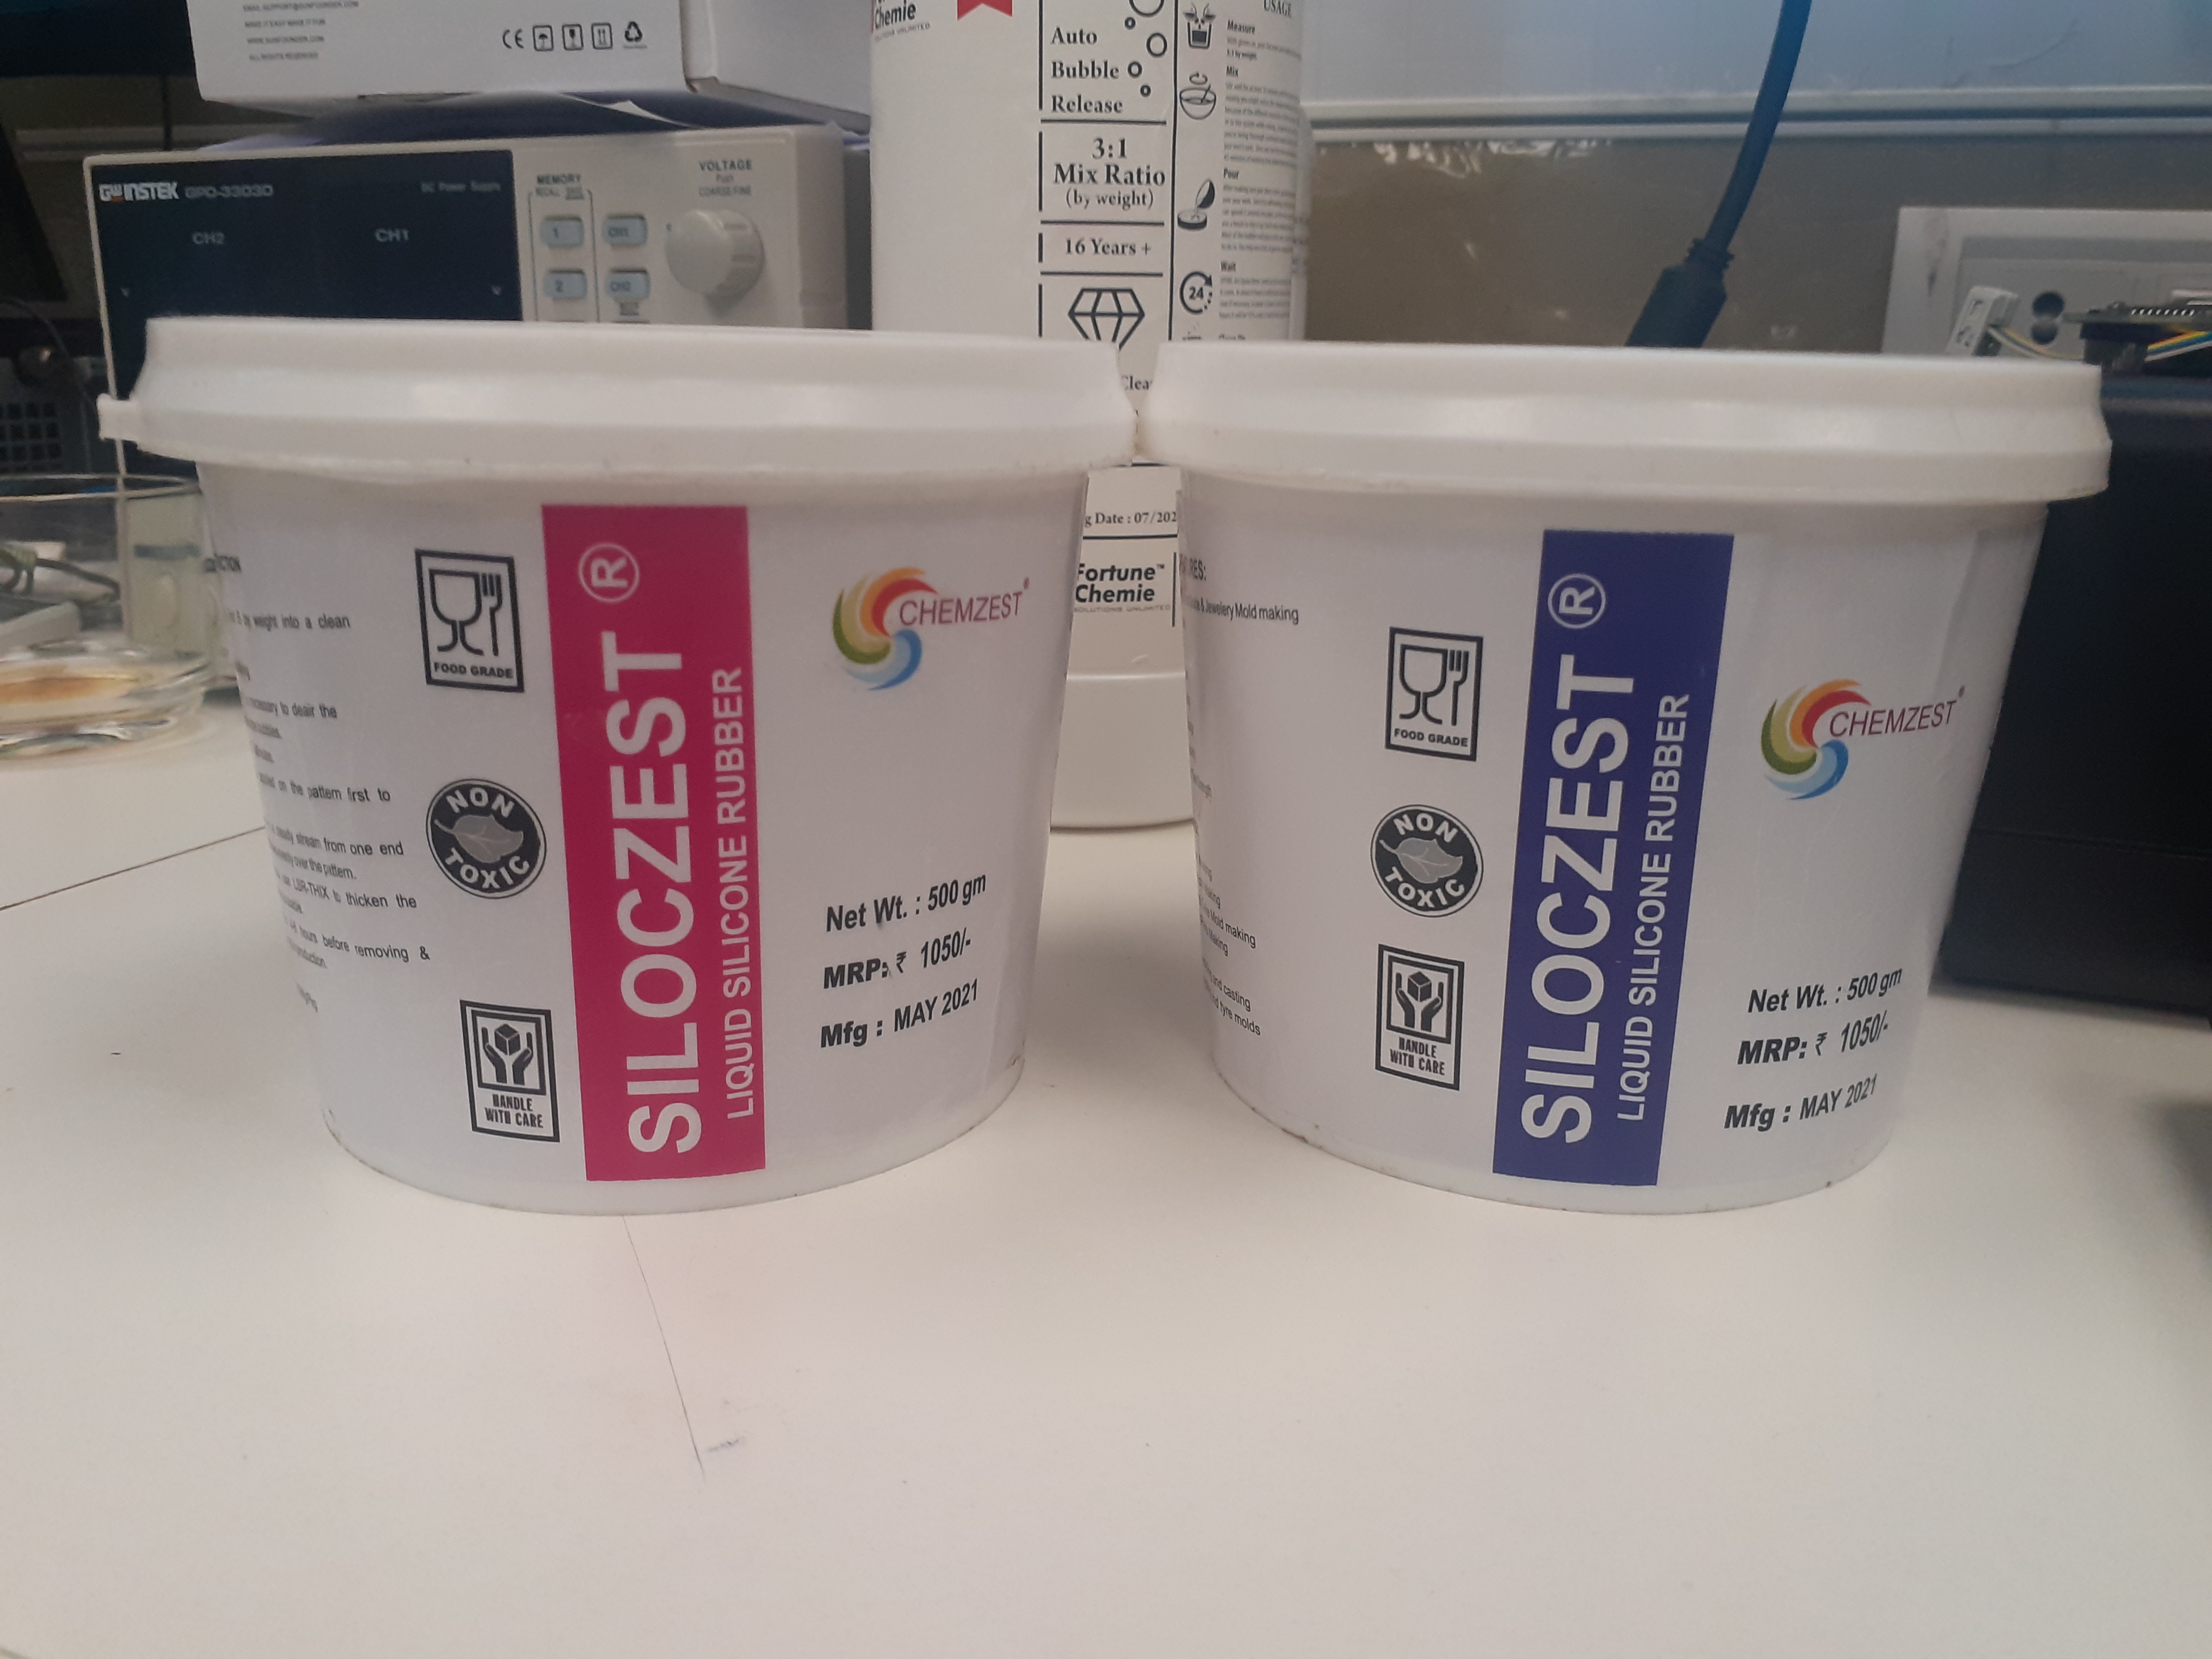
Preparation of Silicon Rubber liquid for Molding
For molding i use Liquid silicone Rubber which have Two part Part A and Part B
as per the User Instruction Mixing ratio is 1:1 by weight .
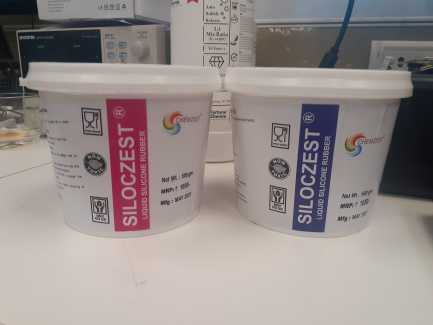
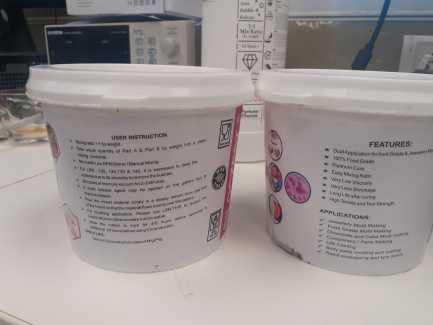
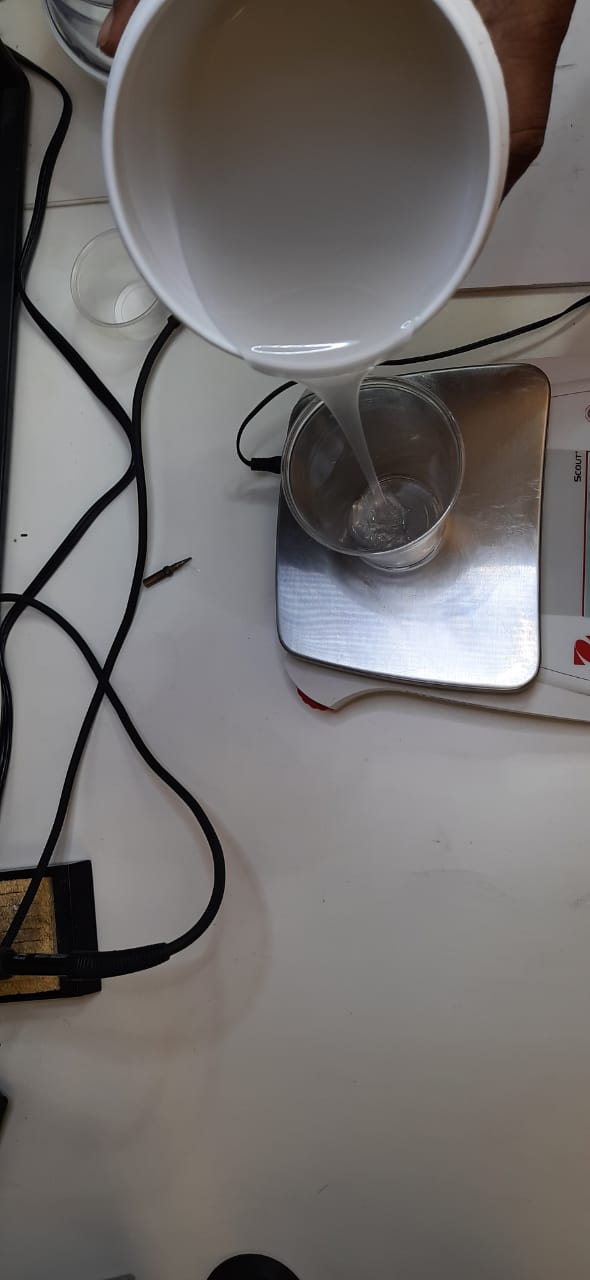
Preparation of Silicon Rubber liquid for Molding
For molding i use Liquid silicone Rubber which have Two part Part A and Part B as per the User Instruction Mixing ratio is 1:1 by weight.Mixing it properly and putting in the Mercury
Vacuum for 2 -3 min. The air bubbles should have to be clear.


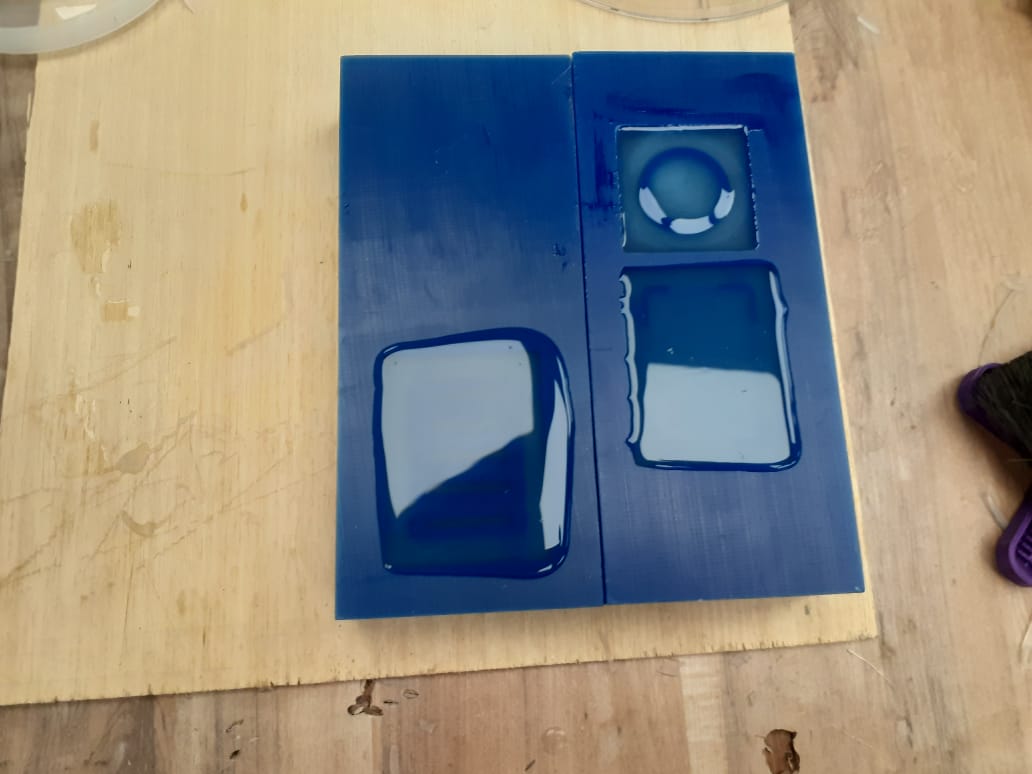
After removing of air bubbles in the mercury vacuum the liquid is put in the milled work piece.
The rubber will take 4-8 hrs for curing.

After 5hrs i observe the rubber is fully cure then i removed.
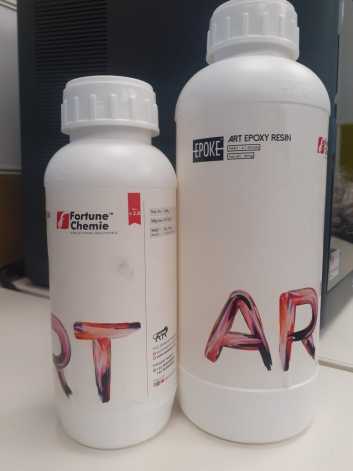
Preparation for casting
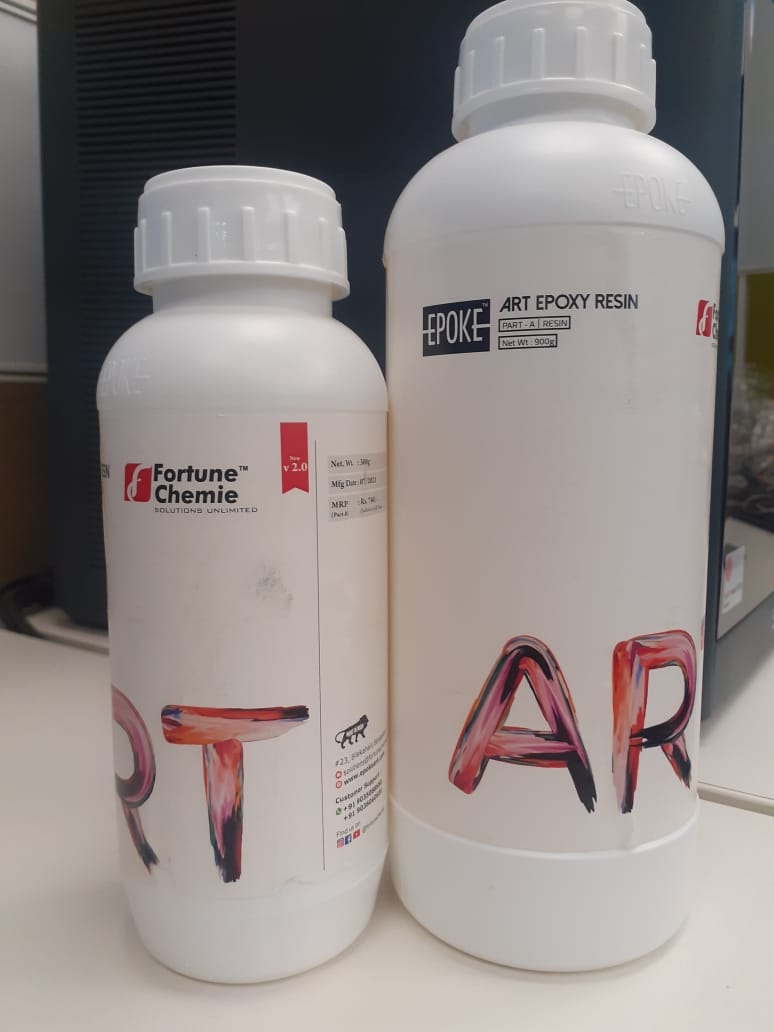
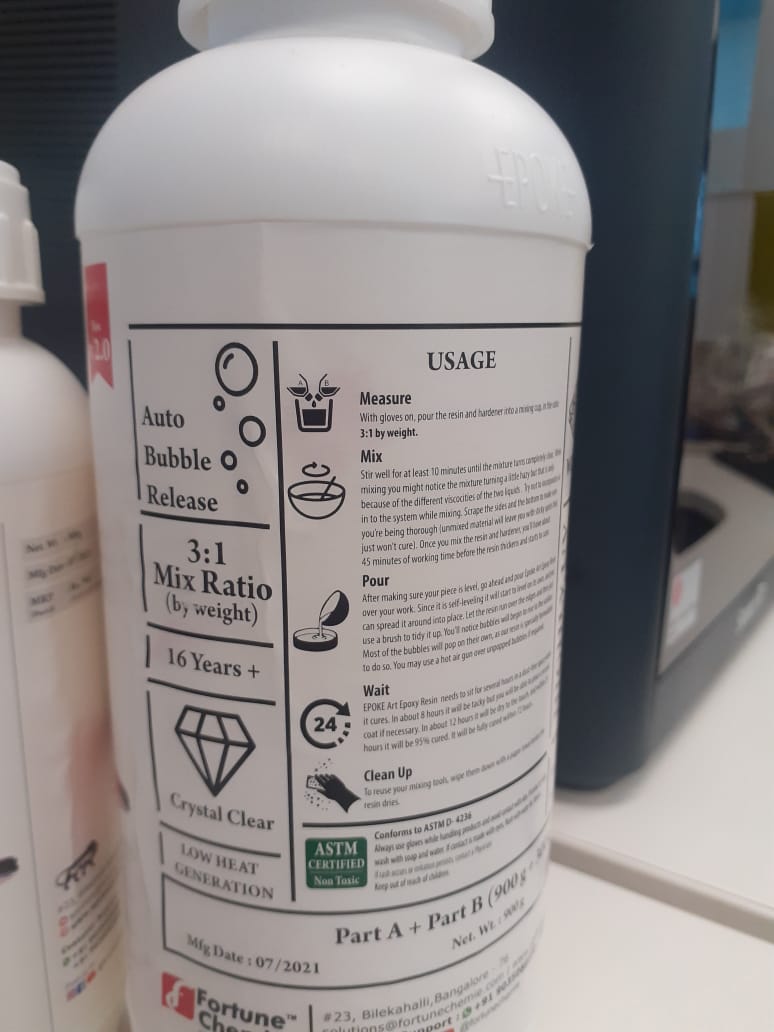
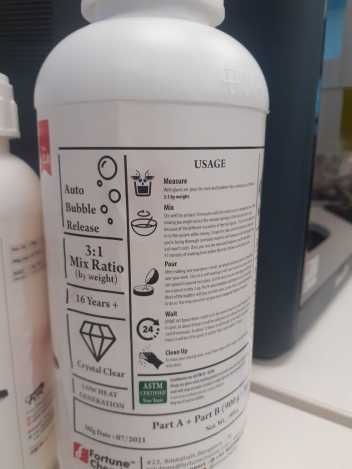
For casting i used here in Part -A Epoxy Resin and Part-B solution.
I went through the usage Procedure the mixing Ratio is 3:1 and
it is auto bubble release.Safety measure is to use gloves as epoxy is harmful
Stir 10 min with stick. I put 1 drop of red colour in the mix.
Preparation for casting
I went through the usage Procedure the mixing Ratio is 3:1 and
it is auto bubble release.Safety measure is to use gloves as epoxy is harmful.Accordingly i mixing epoxy and solution 3:1 by weight and
Stir 10 min with stick. I put 1 drop of red colour in the mix.

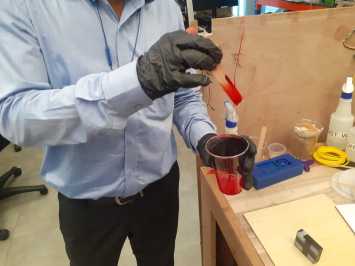
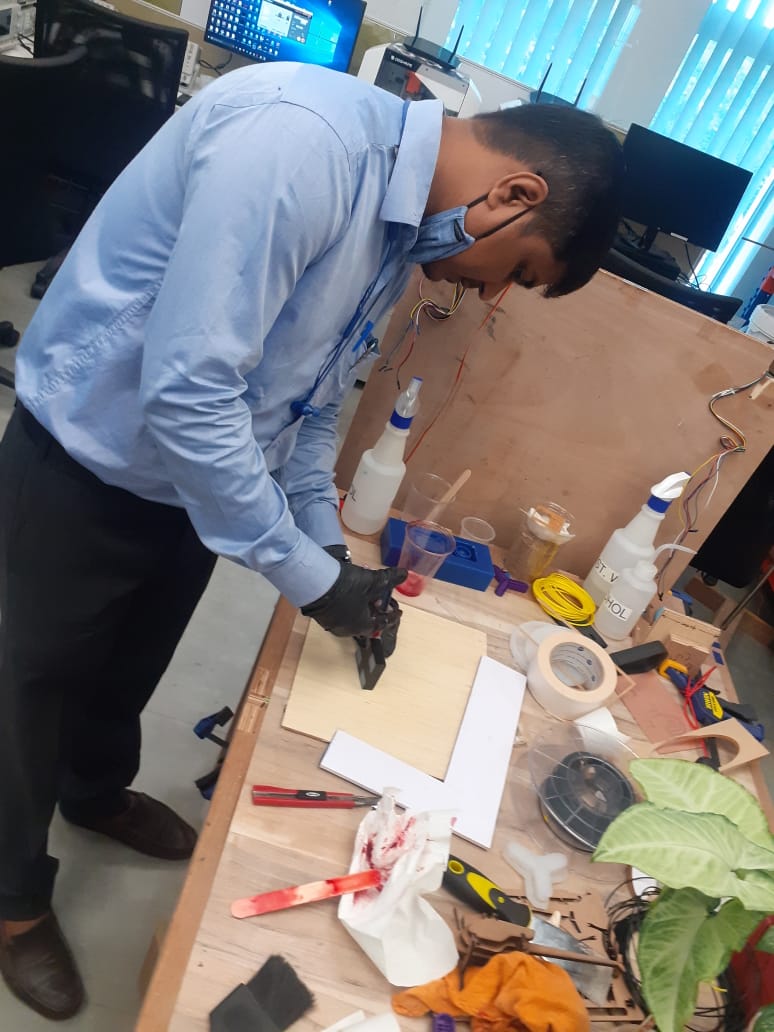
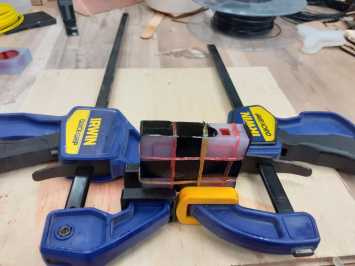
after mixing i use injection Syringe for putting the epoxy into it.i bind with rubber and clamp the epoxy should not flow out.

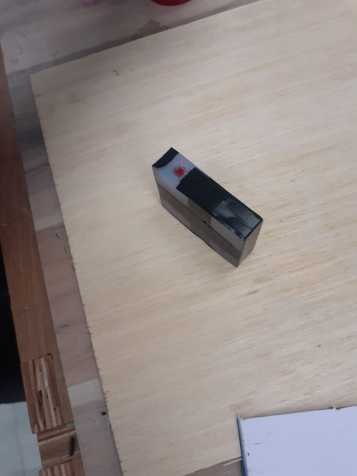
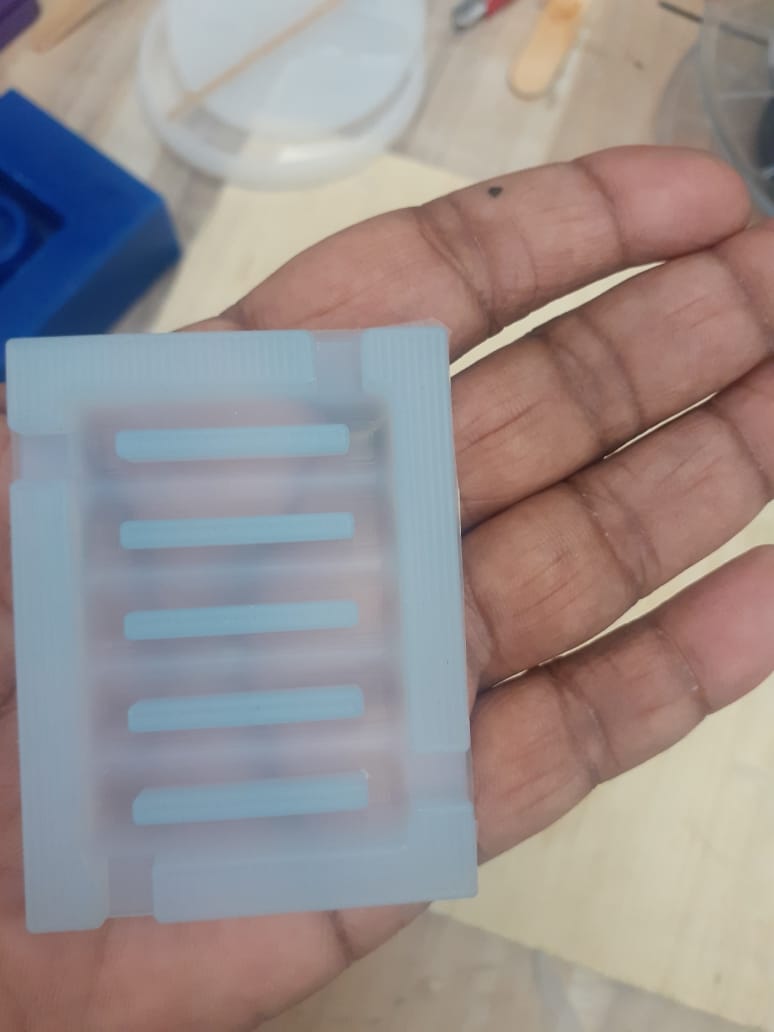
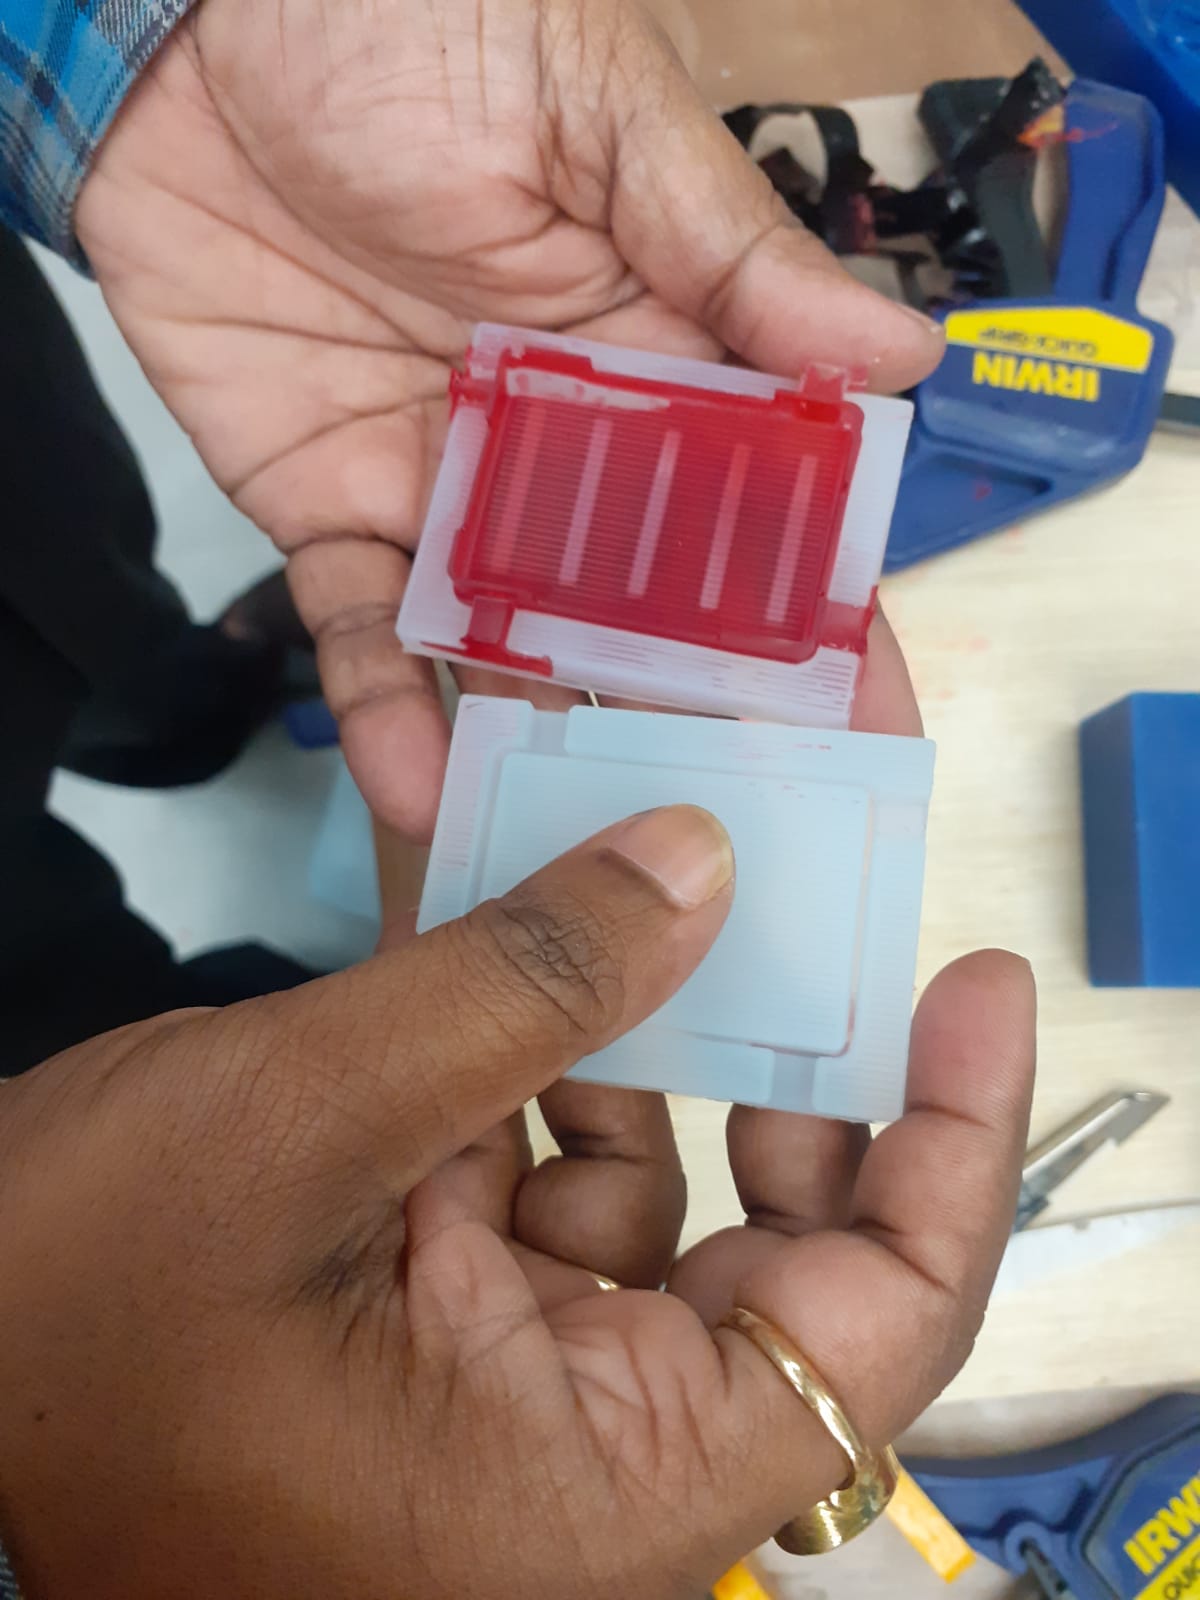
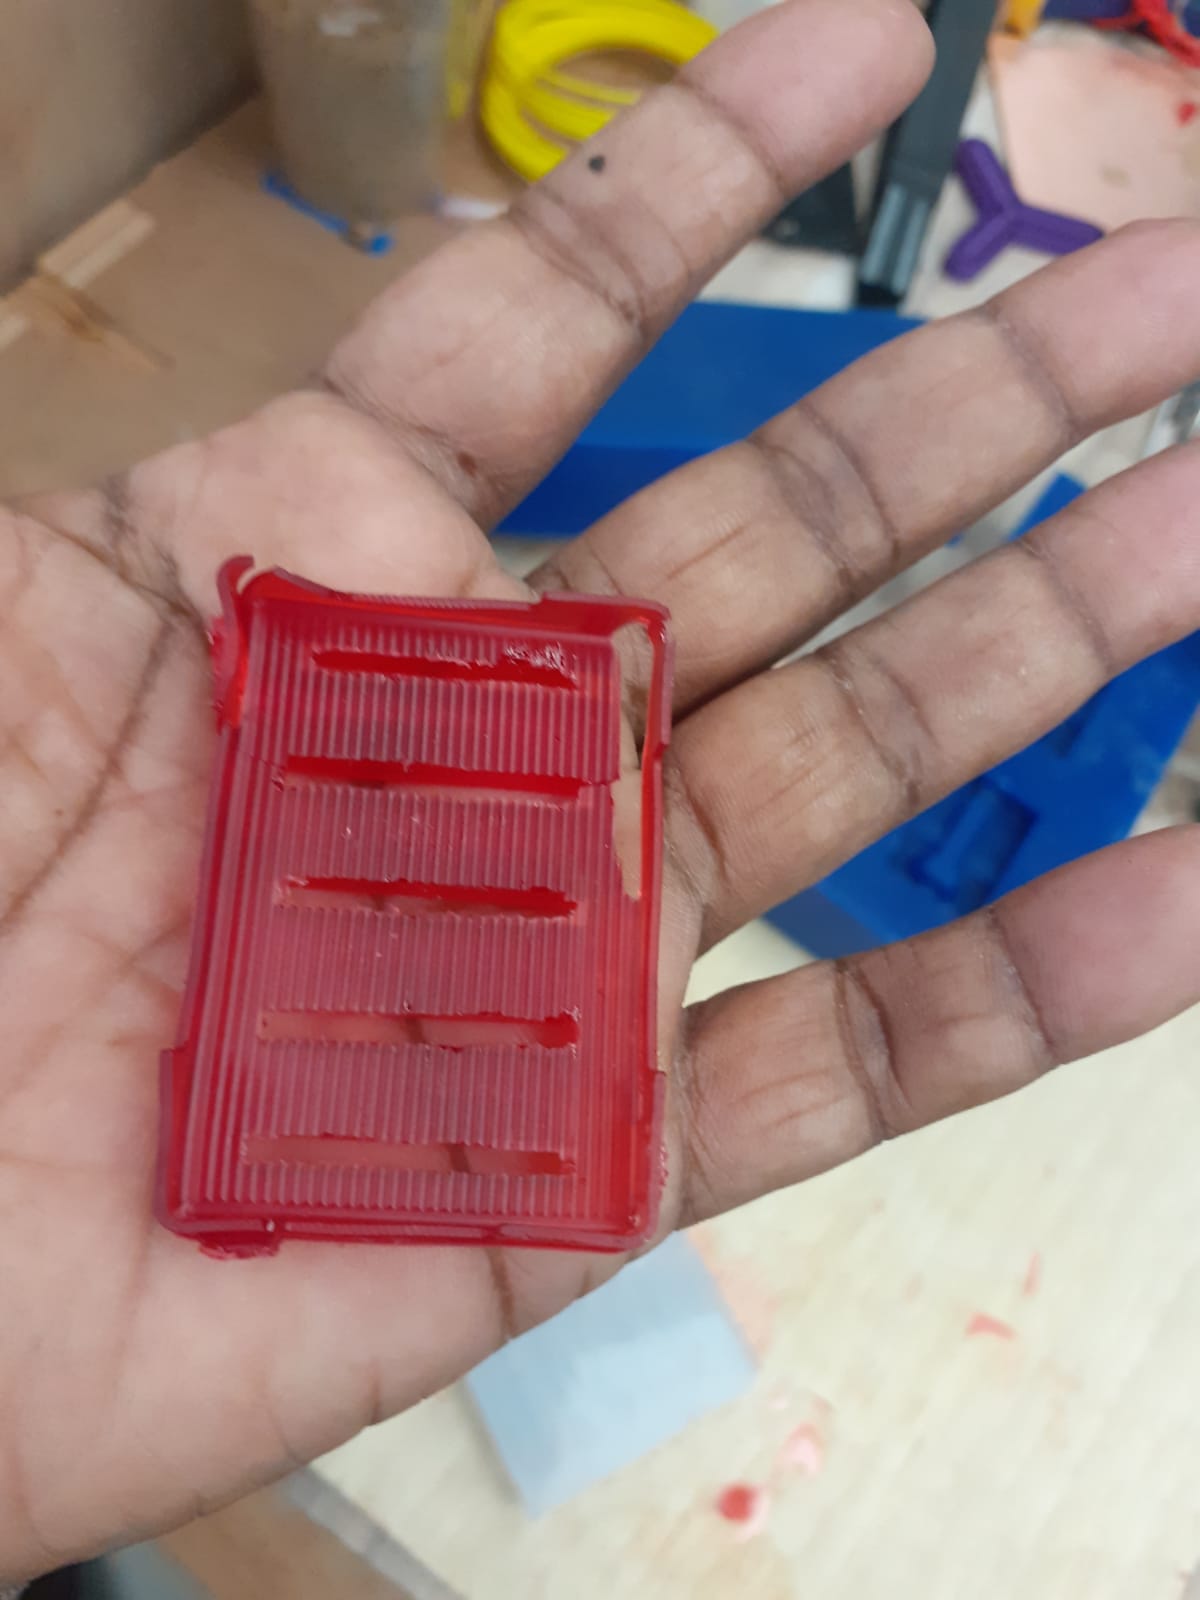
Final product
For proper cure it is taking 24 hrs. i also wait for 24 hrs and i remove But the ouput as in picture.As per my observation
The casting is properly done as my design .

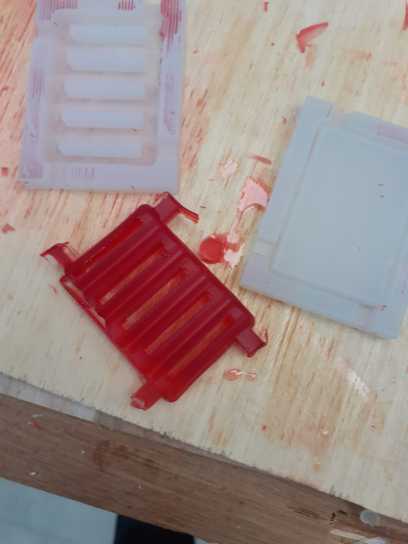
Final product
As per my observation The casting is properly done as my design but the epoxy is leak from one side due to improper binding/fitting of top and bottom mold .

Click to download the files :
Individual Assignment
Molding or Moldmaking is the act of creating the cavity / form that carries a negative or reverse impression of an original model. Molds can be made of a rigid material, such as plaster or plastic resin or more commonly, a flexible material such as rubber. The material to use should be chosen considering the material of the model, the material to be used to make castings, and whether there are any undercuts.
Casting is the act of pouring liquid material into the cavity of a mold. After a period of time, this liquid will cure via chemical reaction or cooling. The solidified part is also known as a casting, which is ejected or broken out of the mold to complete the process. Casting materials are usually metals or various cold setting materials that cure after mixing two or more components together; examples are epoxy, concrete, plaster and clay.


1. https://www.youtube.com/watch?v=OQTYSah8vdc&ab_channel=rolanddgasupport
2. https://www.youtube.com/watch?v=lx_VEpTaAek&ab_channel=rolanddgasupport